


Are you struggling to handle entry to your AWS sources as your group grows? Worry not! AWS Safety Token Service (STS) is right here to save lots of the day.
With AWS STS assume function privileges, you may grant non permanent entry to your AWS sources to customers and functions while not having long-term credentials. And on this tutorial, you’ll study to handle your sources extra effectively whereas conserving them secure and safe.
Learn on and achieve full management of your AWS infrastructure and sources with ease!
Conditions
This tutorial shall be a hands-on demonstration. To comply with alongside, be certain you may have an AWS account with energetic billing enabled, however a free tier account is enough.
Creating an IAM Consumer with Zero Entry
Earlier than you need to use AWS STS assume function privileges, you could first create an IAM person with no permissions assigned to them. This motion could seem counterintuitive however it’s essential as a result of IAM customers can not immediately assume roles. They have to first purchase non permanent safety credentials by assuming a job via the AWS STS service.
To create an IAM person with zero permissions, comply with these steps:
1. Open your favourite internet browser, and log into the AWS Administration Console along with your root AWS account.
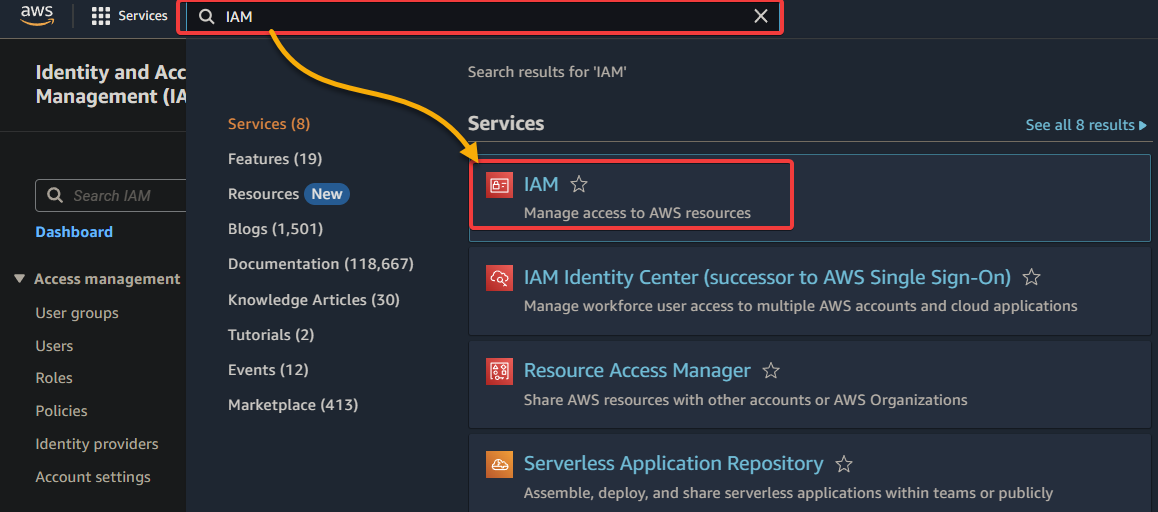
2. Subsequent, seek for and choose IAM from the record of providers to entry the IAM console.
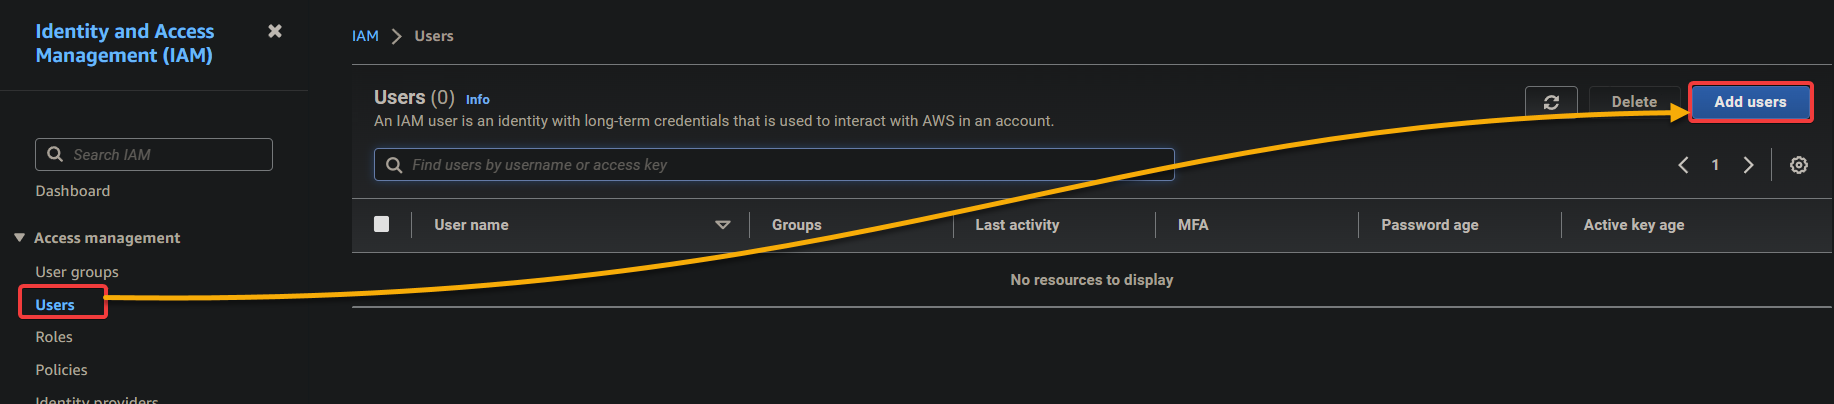
3. On the IAM console, navigate to Customers (left pane), and click on Add Consumer to provoke including a brand new person.
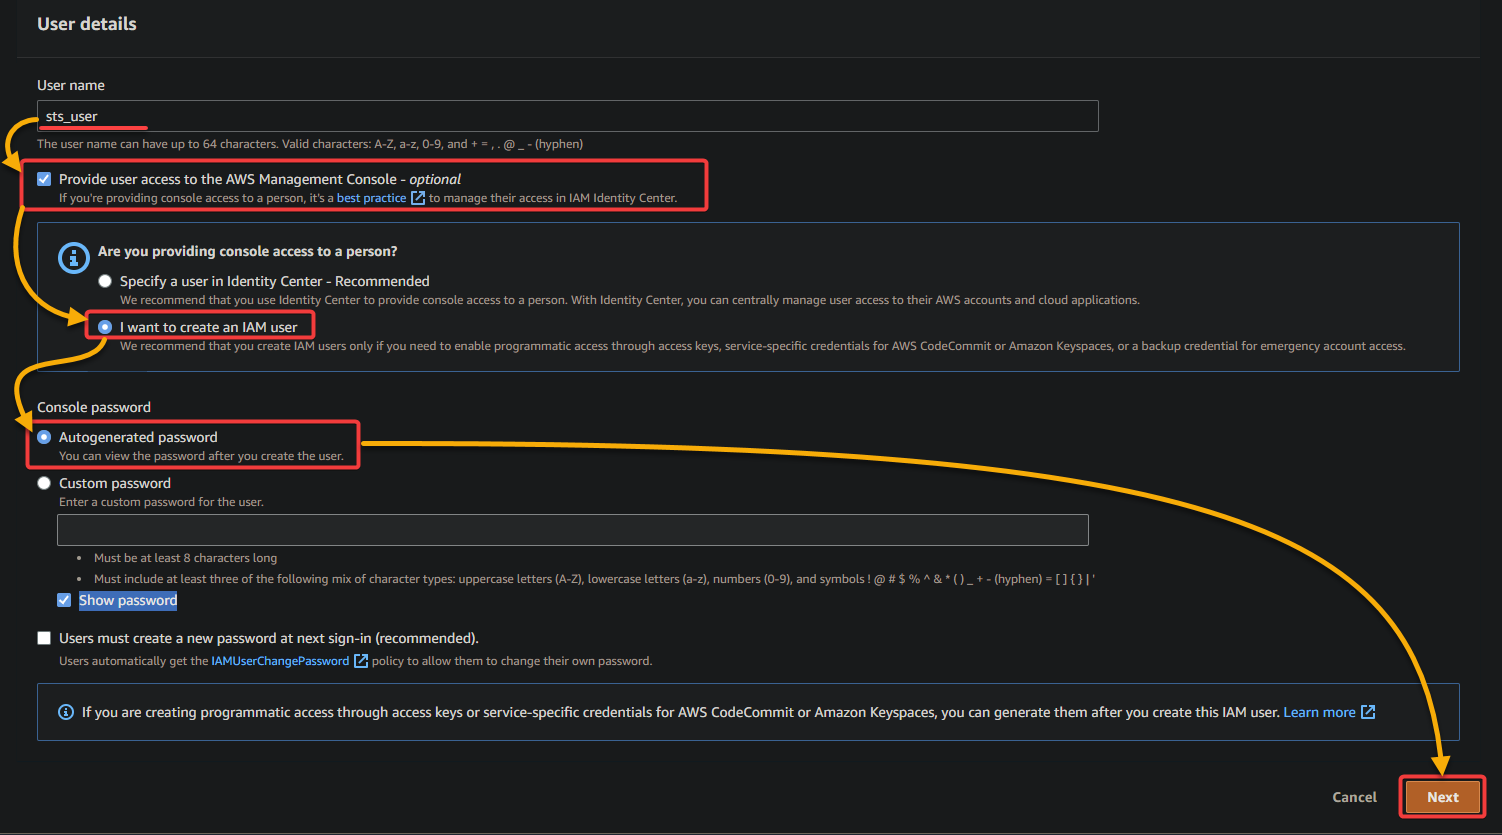
4. Now, configure the person particulars under. This motion lets your IAM person sign up to the AWS Administration Console with their username and password.
- Consumer identify – Present a reputation for the brand new person, and tick the checkbox under to Present person entry to the AWS Administration Console.
- Choose the I wish to create an IAM person choice since you’re creating an IAM person.
- Console password – Select the Autogenerated password choice to generate a password you may change later.
As soon as configured, click on Subsequent to proceed the IAM person creation.
5. On the subsequent web page, go away the defaults as is, and click on Subsequent to skip setting person permissions.
There isn’t any have to assign any permissions to this person since you’re creating one with zero permissions and entry to the AWS Administration Console.
With zero permissions, customers are prevented from taking motion till they assume a job that grants them the mandatory permissions.

6. Subsequent, overview your configured person particulars, and click on Create Consumer to finalize creating the IAM person.

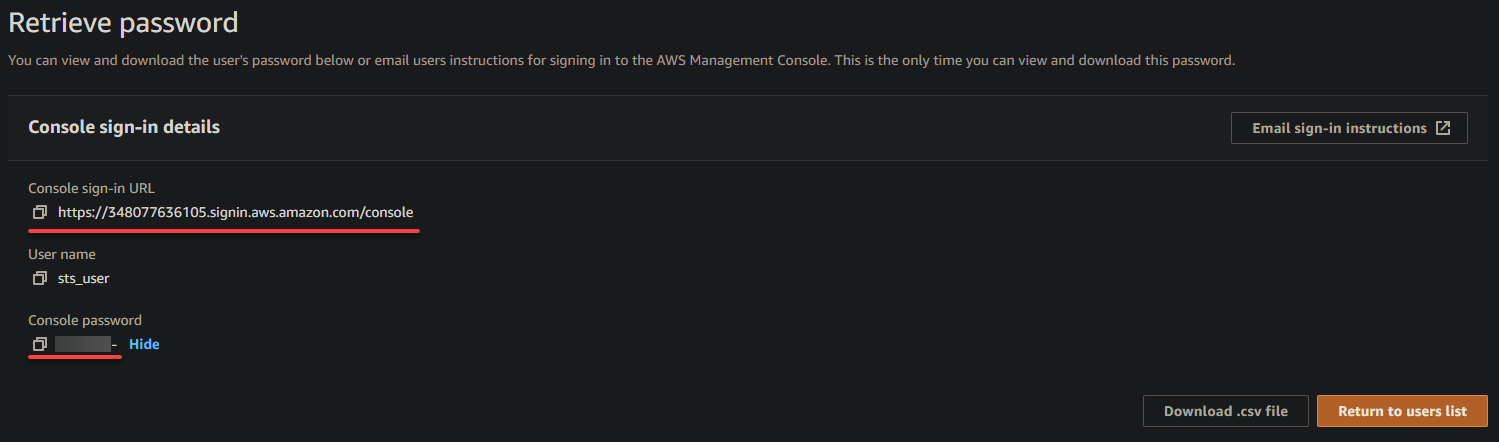
7. Copy and save the sign-in URL and password of the IAM person. You will have this info to sign up with the IAM person later.
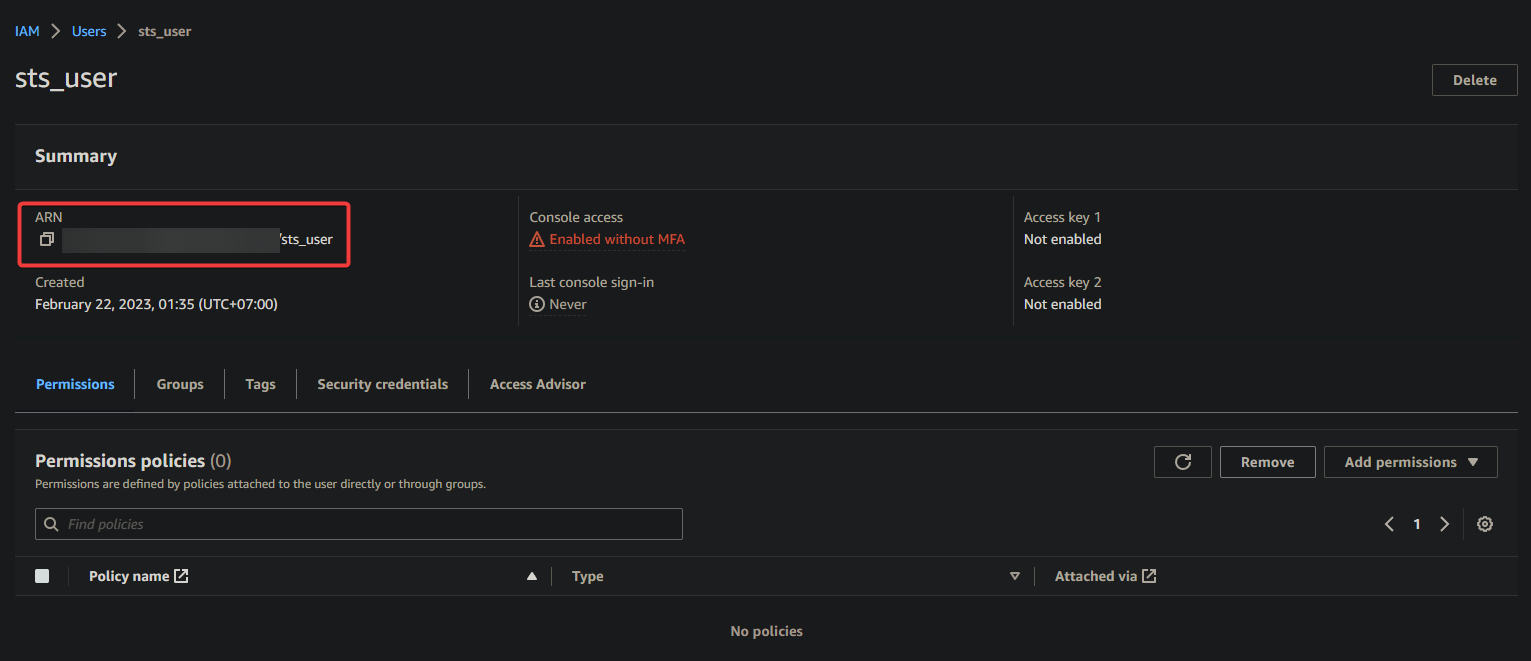
8. Now, return to the IAM console, navigate to the Customers web page (left pane), and click on the newly-created person’s identify to entry its Abstract web page.

9. Lastly, on the Abstract web page, be aware of the person’s Amazon Useful resource Title (ARN), the person’s distinctive identifier. You will have this ARN later once you assign a job to the person.
Making ready a Customized Belief Coverage
With a devoted IAM person created, you’re able to assume the function, granting entry to AWS sources. However for an IAM person to imagine a job, the function should first belief the person.
By making a customized belief coverage, you’ll set up a “belief relationship” between the IAM person and the function. This belief relationship specifies which customers or accounts can assume the function and beneath what situations.
To arrange a customized belief coverage, comply with these steps:
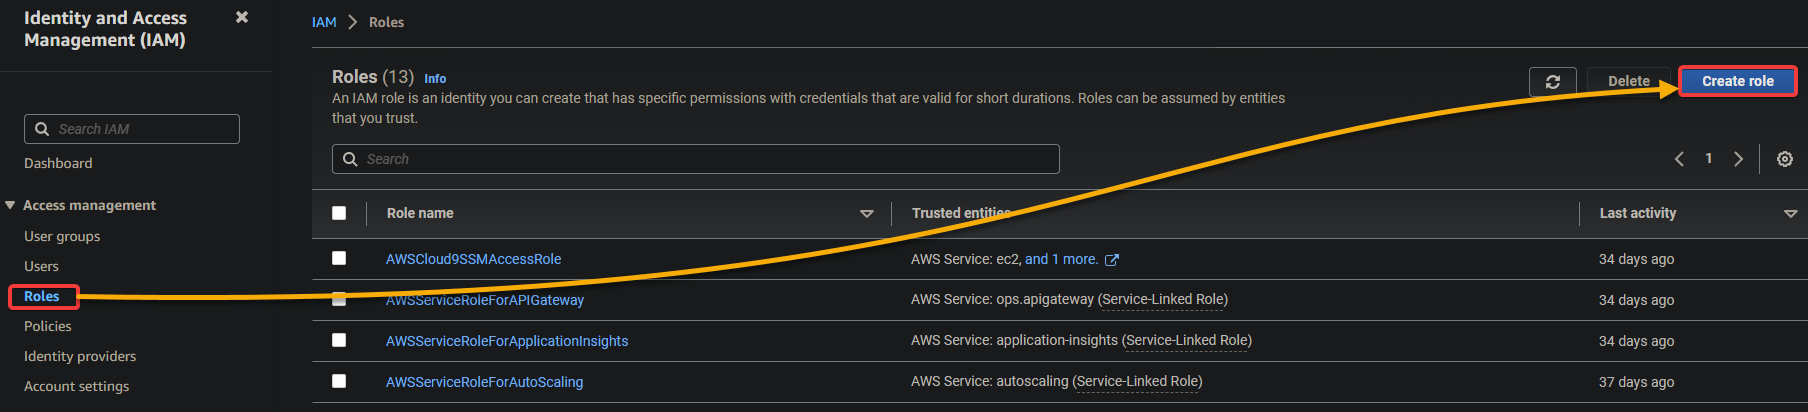
1. Navigate to Roles (left pane) within the IAM console, and click on Create function to provoke creating a brand new function.
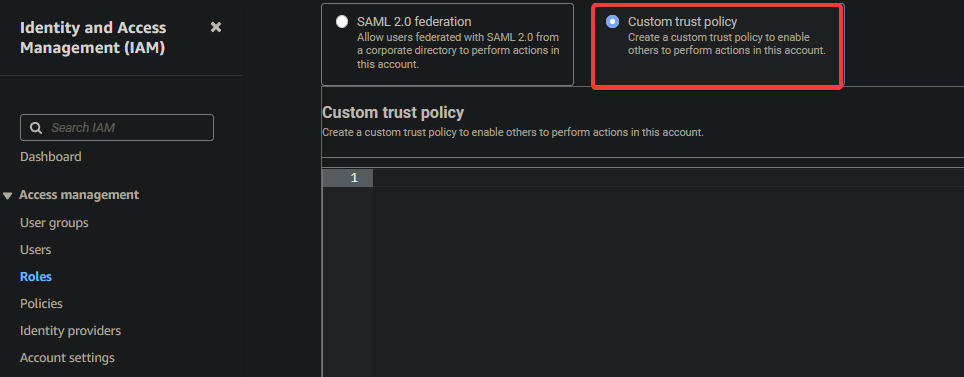
2. Subsequent, click on the Customized belief coverage choice to create a customized coverage.
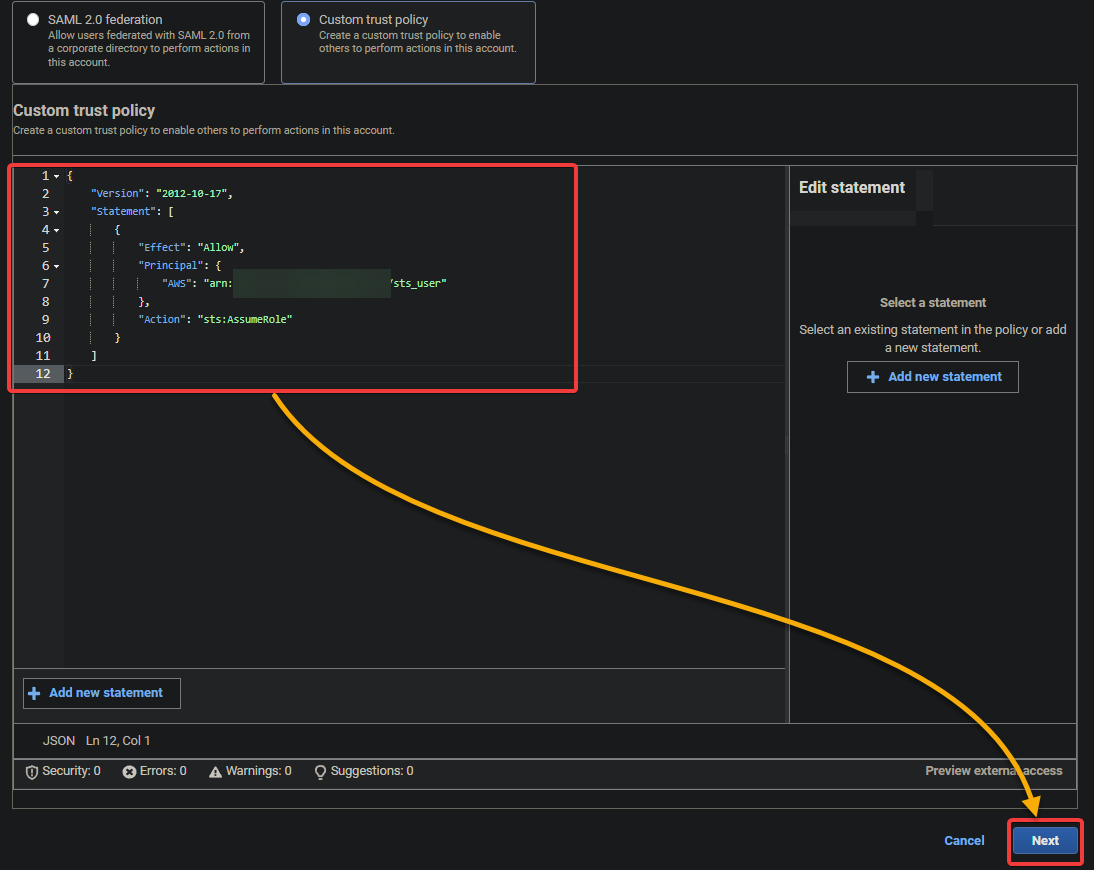
3. Enter the next coverage into the textual content subject, as proven under, and click on Subsequent. Change YOUR_ARN along with your IAM person’s ARN that you simply famous within the final step of the “Creating an IAM Consumer with Zero Entry” part.
Beneath is a primary instance of a customized belief coverage that permits a specified IAM person or function to imagine a selected IAM function with the next fields:
| Discipline | Operate |
|---|---|
| Model | Specifies the model of the coverage language. |
| Assertion | Accommodates the coverage assertion(s). |
| Impact | Specifies whether or not the assertion permits or denies entry, with Enable, on this case, granting entry. |
| Principal | Specifies the entity allowed to imagine the function; on this instance, it’s an empty string. |
| Motion | Specifies the motion the IAM person or function is allowed to carry out. The sts:AssumeRole worth permits the person to imagine the desired IAM function. |
{
    "Model": "2012-10-17",
    "Assertion": [
        {
            "Effect": "Allow",
            "Principal": {
               "AWS": "YOUR_ARN"
            },
            "Action": "sts:AssumeRole"
        }
    ]
}
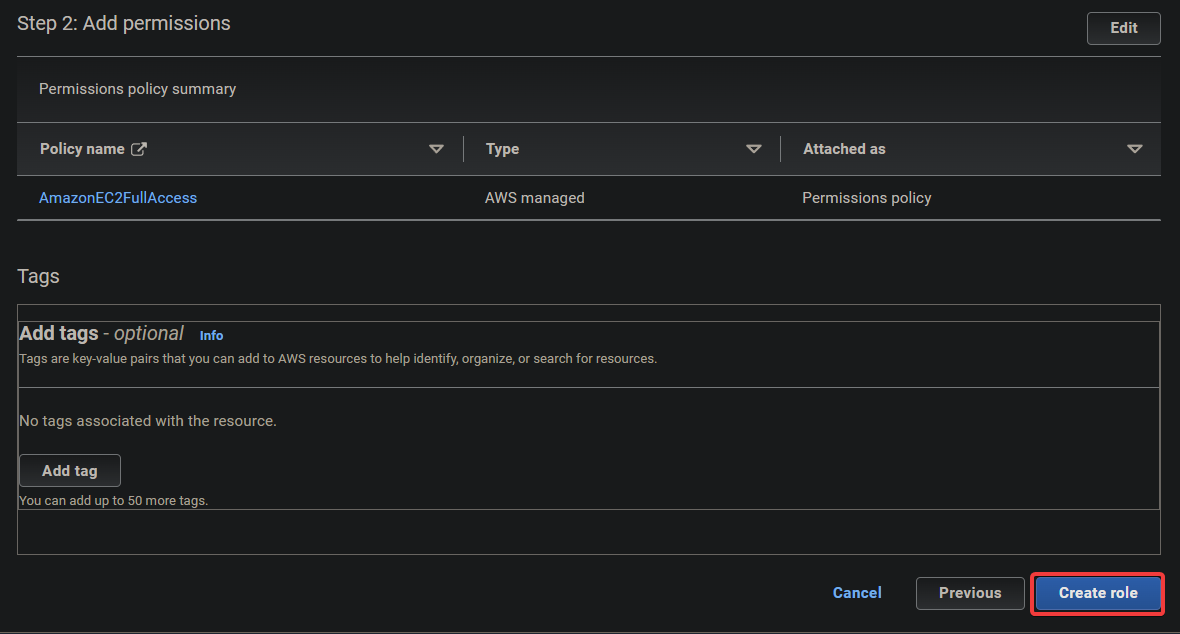
4. On the subsequent web page, seek for and choose AmazonEC2FullAccess from the record of insurance policies that seems, and click on Subsequent. This coverage grants full entry to all EC2 sources.
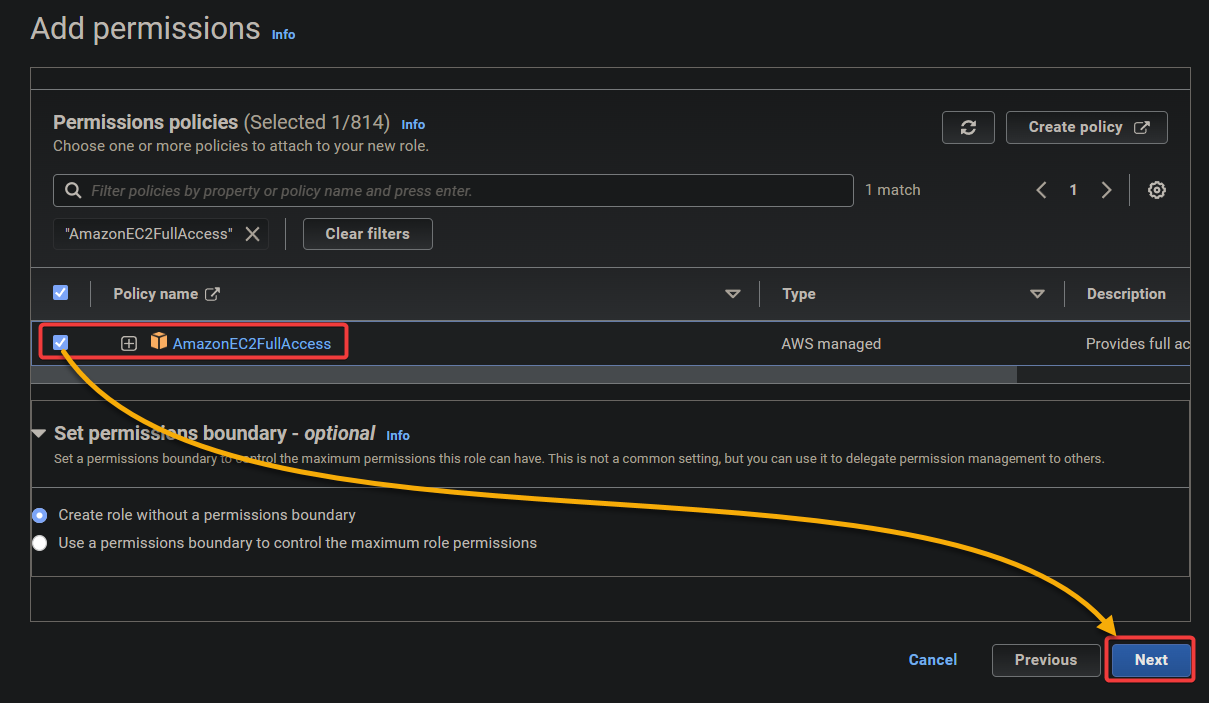
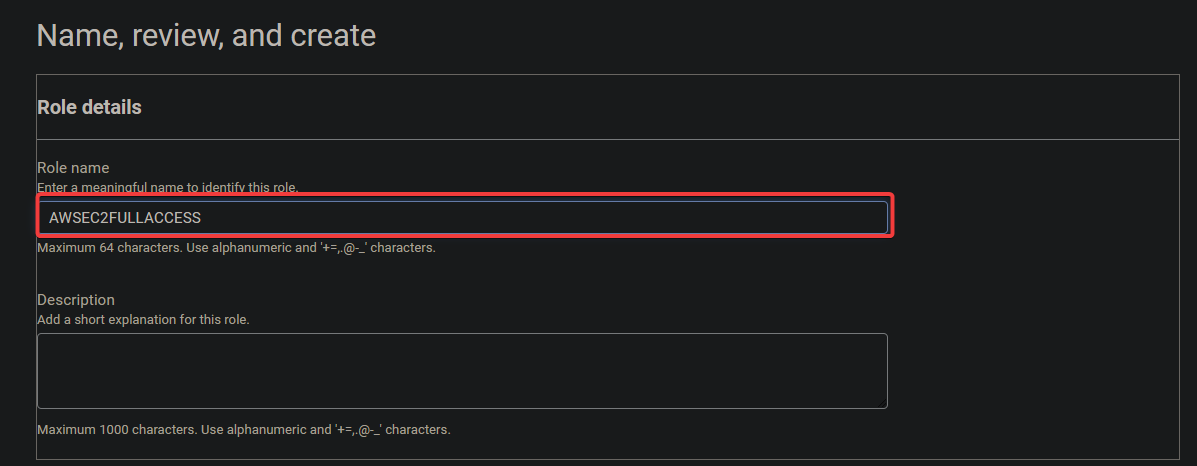
5. Subsequent, present a reputation to your customized belief coverage (i.e., AWSEC2FULLACCESS).
6. Preserve different settings as is, and click on Create function to finalize creating the function.
At this level, the function ought to be assumable by the IAM (sts_user). When assumed, the person can have entry to all EC2 sources, like itemizing, creating, and deleting EC2 cases, and so on.
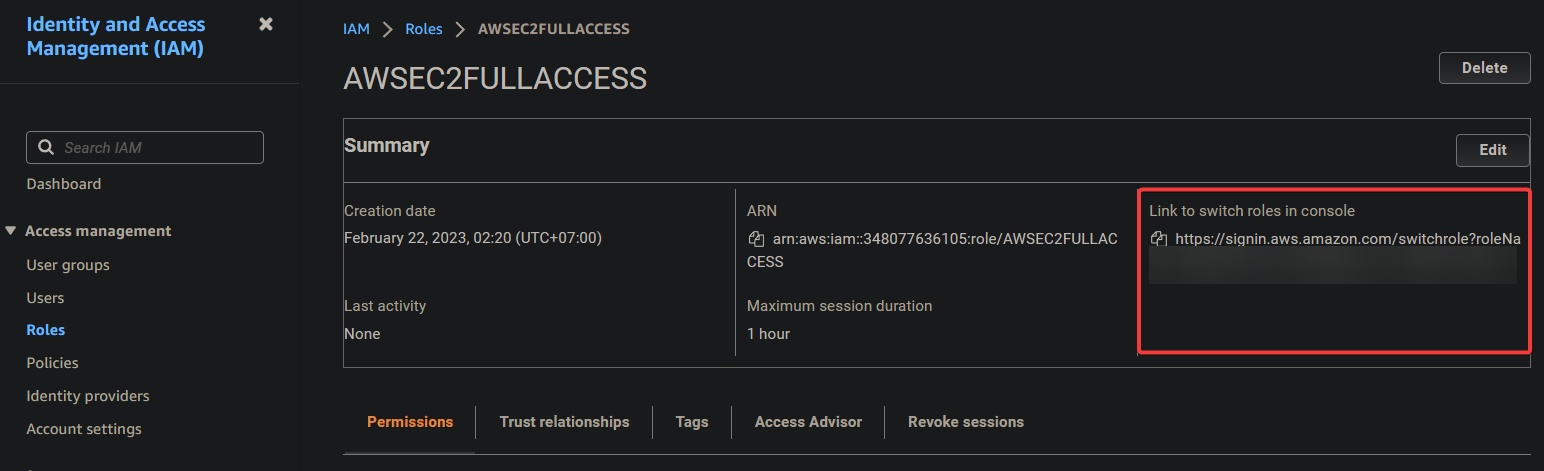
7. Click on on the newly-created function, as proven under, to view its particulars.
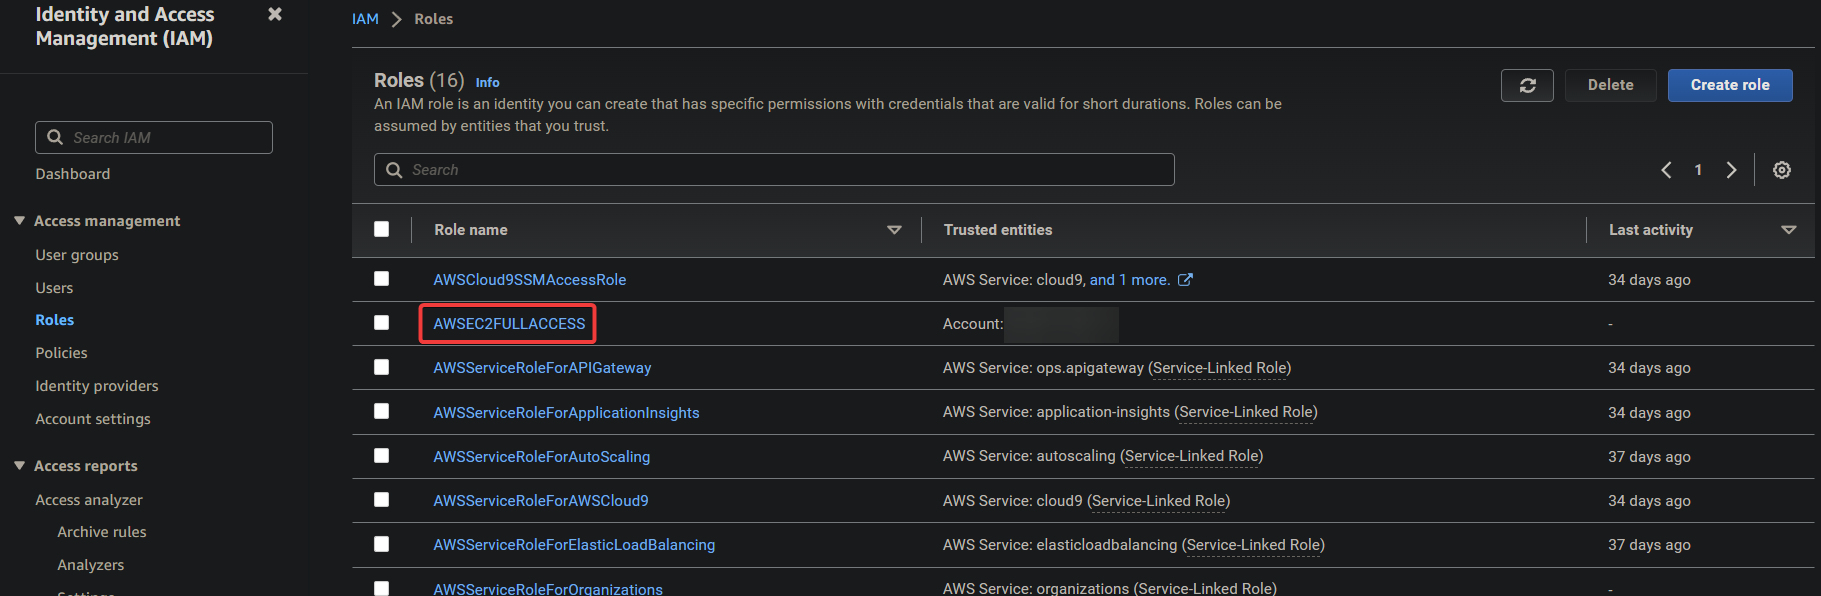
8. In the end, copy the Hyperlink to modify roles in console and put it aside. You will have this hyperlink later to modify roles within the console once you sign up with the IAM person (sts_user).
Switching and Assuming a Function with an IAM Consumer
After creating a job, now you can assume the function along with your devoted IAM person. You’ll log in to the AWS console along with your IAM person and swap to the function you created to check the EC2 entry.
To see learn how to swap and assume a job with an IAM person:
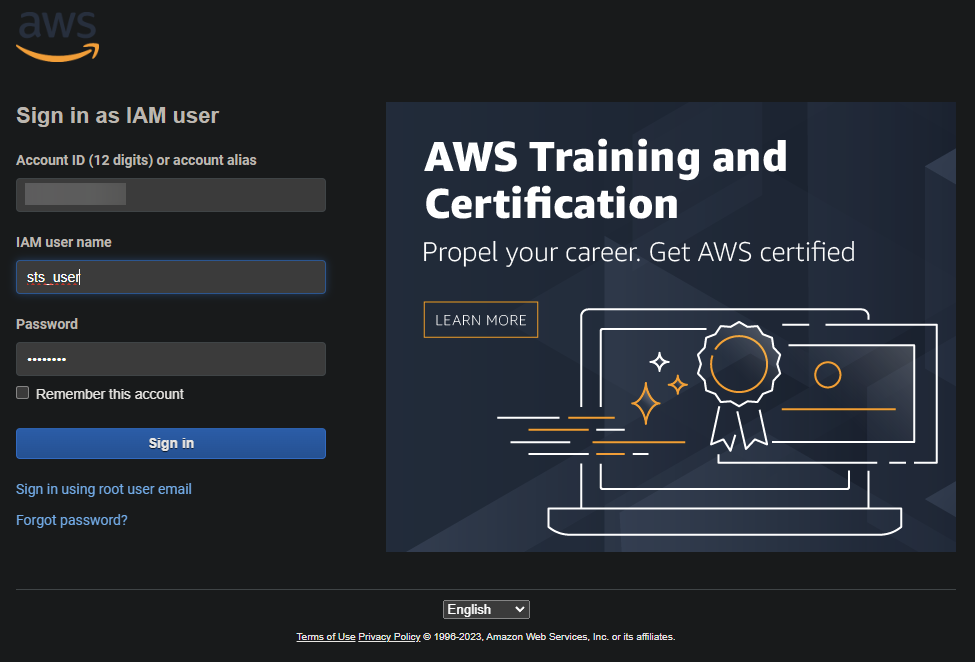
1. Navigate to the sign-in URL you famous in step seven of the “Creating an IAM Consumer with Zero Entry” part, and log in with the IAM person’s password.
💡Keep away from conflicts along with your root account by logging in utilizing a unique browser or an incognito window.
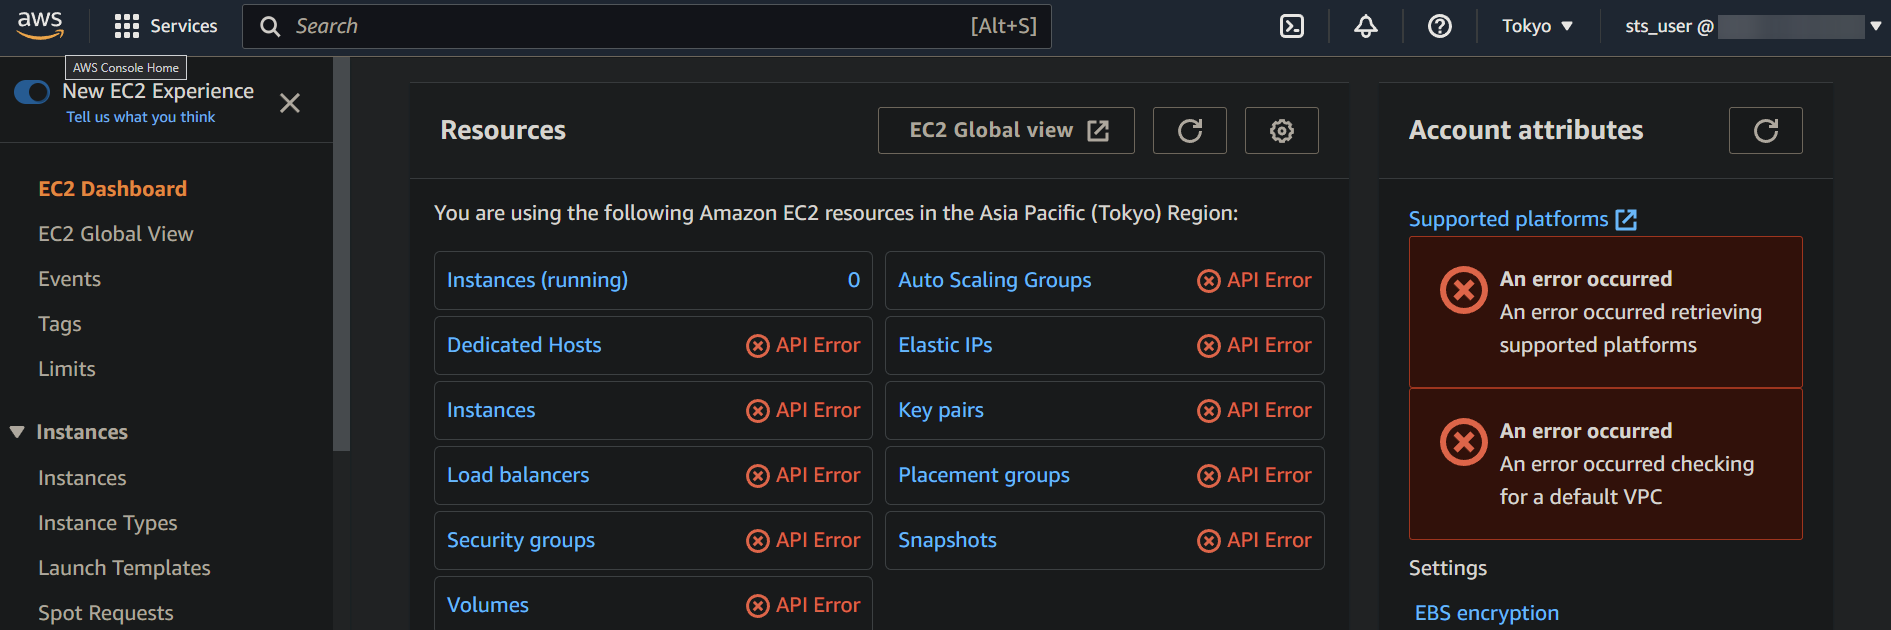
2. As soon as logged in, navigate to the EC2 console, and you will note many API errors in purple, as proven under. These errors point out that the IAM person doesn’t have permission to entry the EC2 sources.
To repair these errors, you could assume the function you created to be granted entry to all EC2 sources (AWSEC2FULLACCESS) within the following step. Once you assume a job in AWS, you quickly tackle the permissions related to that function.
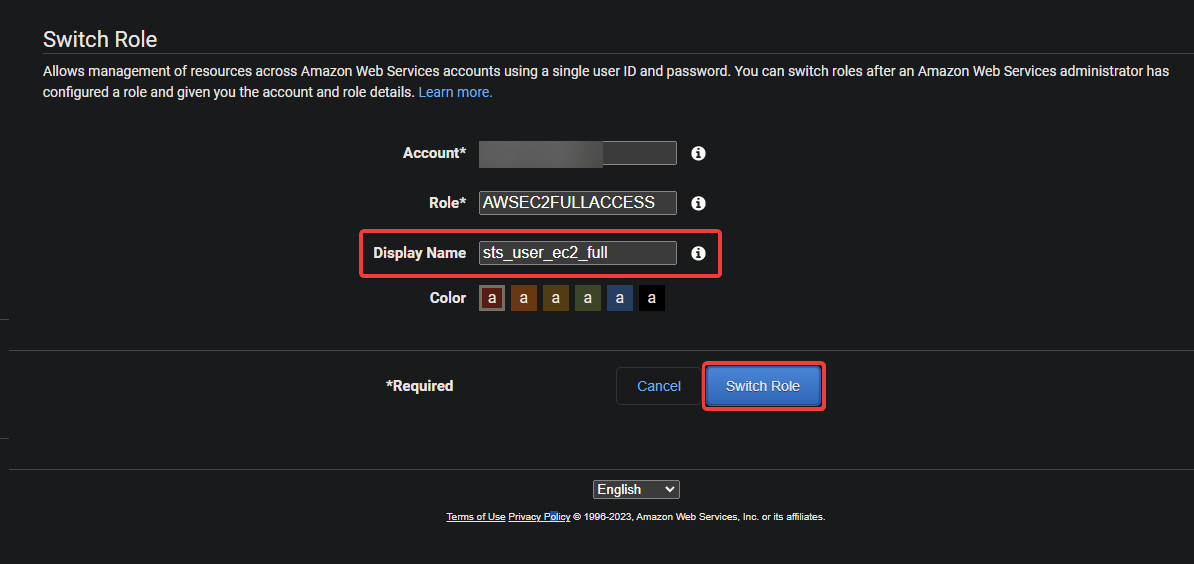
3. Open a brand new browser tab, and navigate to the “hyperlink to modify roles” you famous within the final step of the “Making ready a Customized Belief Coverage” part.
This hyperlink is a particular URL that takes you on to the Swap Function web page within the AWS Administration Console. The Swap Function web page means that you can assume a unique function, a set of permissions figuring out what AWS sources you may entry.
4. Now, present a descriptive Show Title for the session, and click on Swap Function to imagine the function. The show identify helps you retain observe of your energetic classes.
After assuming the function, your browser redirects to the AWS Administration Console with the permissions of the chosen function.
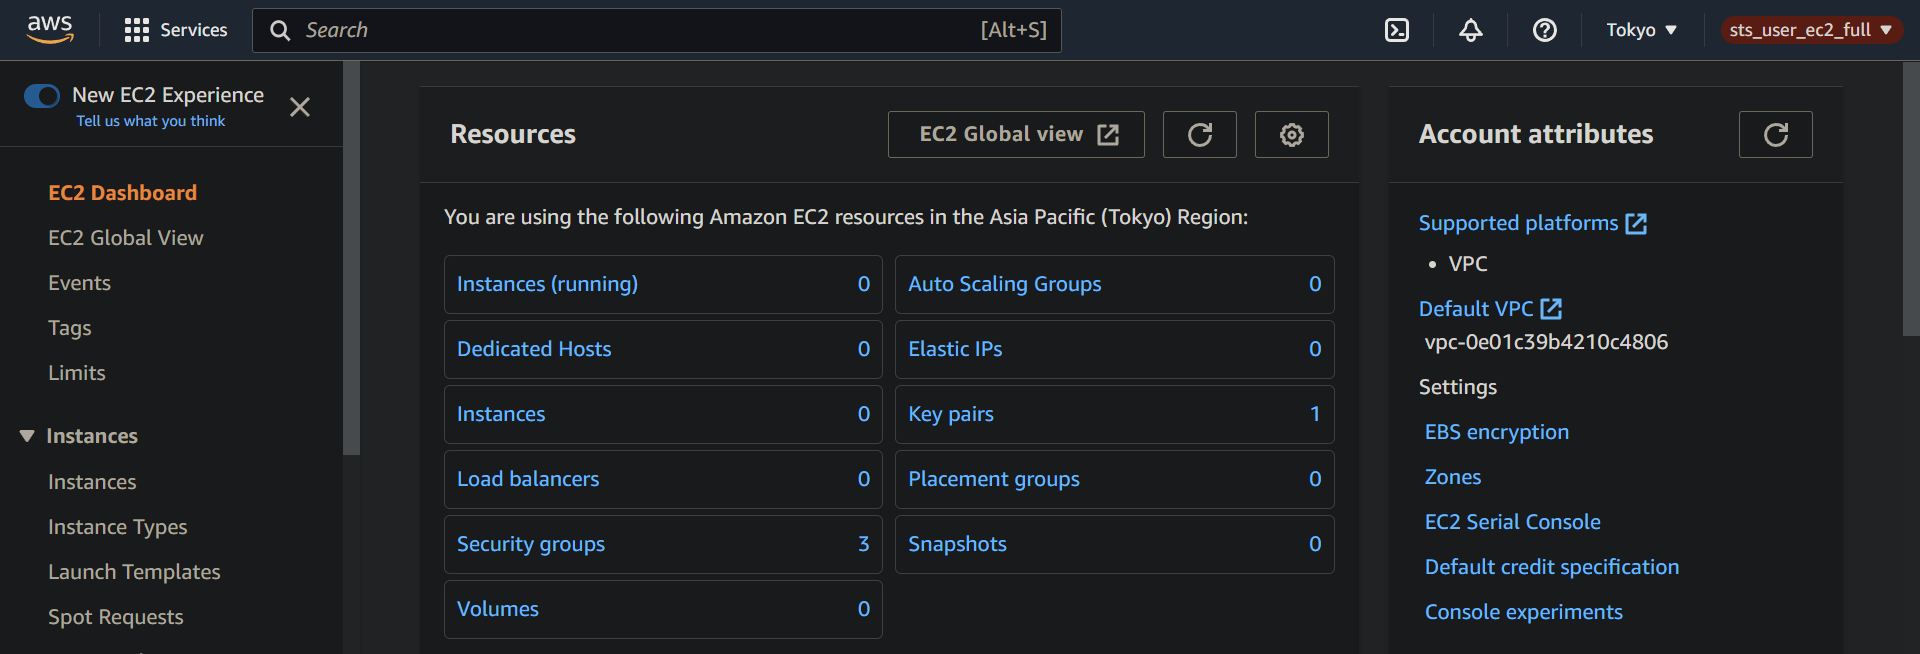
5. Navigate to the EC2 console once more to substantiate that your IAM person has been granted entry to EC2 sources.
If all goes effectively, you’ll now not see the API errors you noticed earlier because you at the moment are logged in with the function’s permissions, together with entry to EC2 sources.
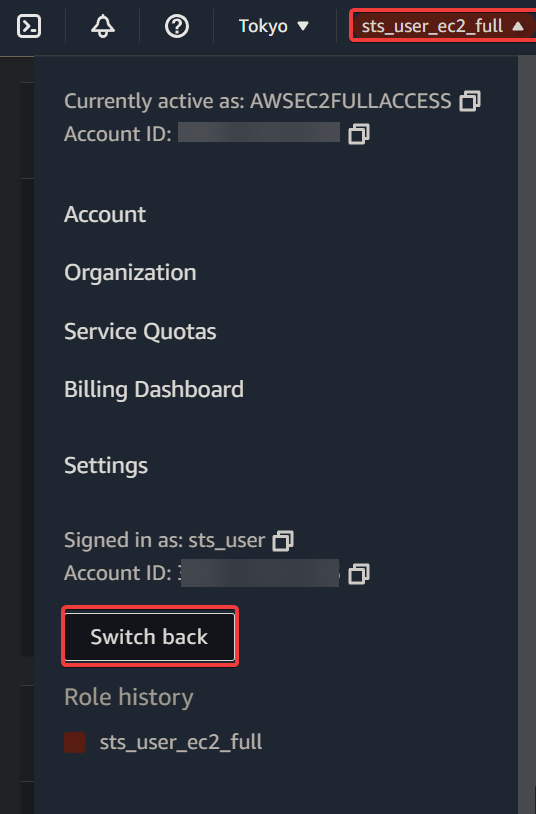
6. Lastly, click on your session’s show identify (top-right) and choose Swap again to modify to the unique IAM person.
You may be logged out of your present session and logged in as your authentic IAM person with its authentic set of permissions. This motion is the most effective follow to scale back the chance of by chance performing unintended actions.
Conclusion
Assuming a job in AWS is a strong characteristic that allows you to grant non permanent entry to sources with out sharing your everlasting credentials. And all through this tutorial, you may have discovered to leverage AWS STS assume function privileges.
At this level, you may confidently assume a job with restricted permissions to make sure the safety of your sources and decrease the potential impression of any unintentional or malicious actions.
The AWS Administration Console is a superb solution to begin with AWS providers like assuming roles. However why not attempt to assume a job through the AWS Command Line Interface (CLI)? Exploring and integrating AWS CLI into your automation scripts can present extra superior options and functionalities.