


Good day guys, in case you are questioning the way to set the logging degree on spring boot
then you might have come to the suitable place. Previously, I’ve shared the greatest Spring Boot programs and free programs to be taught Spring MVC and on this
article, I’ll share the way to set logging ranges like DEBUG and INFO in Spring
Boot. How will we configure the logging degree of our Spring boot
utility is without doubt one of the questions that come up when growing a big
utility. As a result of we have to hint errors, warnings, informational knowledge
when working our utility and to this, Spring has launched Spring boot
logging configurations.
So on this tutorial, we’re going to focus on how we are able to implement spring boot
logging configuration through utility.properties or utility.yml, each are
legitimate Spring boot configuration information.
By configuration the appliance.properties file based on under, we are able to
find it underneath the useful resource folder of our utility. So given under is the
utility.properties information which we used on this tutorial.
logging.degree.org.springframework=DEBUG
logging.degree.com.howtodoinjava=DEBUG

#that is used to retailer the loggers within the tempdir folder
logging.file=${java.io.tmpdir}/utility.log

# The best way the way you create the logging information
logging.sample.file= %d{yyyy-MM-dd HH:mm:ss} [%thread] %-5level %logger{36} - %msg%

# The best way the way you write the logging patterns throughout the file
logging.sample.console= %d{yyyy-MM-dd HH:mm:ss} - %msg%
So in under, we're going to focus on about completely different type of loggings which is utilizing in Spring utility. So first take a look at default loggings in Spring boot utility.
Default logging in Spring boot.
So within the default technique of logging, there isn't a want so as to add any configuration on utility.properties file. So under is an instance code of it.
import org.slf4j.Logger;
import org.slf4j.LoggerFactory;non-public closing Logger LOGGER = LoggerFactory.getLogger(this.getClass());
@RestController
public class AppController {@RequestMapping("/instance")
public String instance(Map<String, Object> mannequin) {LOGGER.debug("It is a debug message");
LOGGER.information("That is an information message");
LOGGER.warn("It is a warn message");
LOGGER.error("That is an error message");mannequin.put("instance", "Instance !");
return "index";
}
}
Begin your utility and name the get technique /instance, then you're going to get the next kind of response in your utility console.
2021-10-07 14:54:05 - GET "/ping", parameters={}
2021-10-07 14:54:05 - Mapped to com.programming.itjobspro.controller.AppController#healthCheck()
2021-10-07 14:54:05 - Opening JPA EntityManager in OpenEntityManagerInViewInterceptor
2021-10-07 14:54:05 - That is an information message
2021-10-07 14:54:05 - It is a warn message
2021-10-07 14:54:05 - That is an error message

Word: The default logging degree is INFO because the debug messages should not current. We will additionally configure the logging sample by writing it within the utility.properties file by configuring in it.
# The best way the way you create the logging information
logging.sample.file= %d{yyyy-MM-dd HH:mm:ss} [%thread] %-5level %logger{36} - %msg%

So within the above sample, the output logging message will likely be printed as under varieties.
- Date and Time - Millisecond precision.
- Thread identify - Enclosed in squre brackets.
- Logger identify - Class identify
- message - Log message
Log Ranges
Once you use logs in your functions, there are specific ranges and there are numerous variety
loggers in Spring utility. Spring boot loggers, utility loggers, Hibernate loggers,
Thymeleaf loggers and plenty of extra.
Logging ranges obtainable - TRACE, DEBUG, INFO, WARN, ERROR, FATAL, OFF
And likewise you may configure the basis degree utilizing logging.degree.root. In your
utility.properties file, add the next strains of code.
#logging.degree.root=WARN
logging.degree.org.springframework.internet=ERROR
logging.degree.com.howtodoinjava=DEBUG
After upgrading the log of the appliance to DEBUG mode, then the output logs will likely be
follows.
2021-10-07 15:26:34 DEBUG 4092 --- [nio-8080-exec-1]
 com.programming.itjobspro.controller: debug log assertion printed
2021-10-07 15:26:34  INFO 4092 --- [nio-8080-exec-1]
 com.programming.itjobspro.controller: information log assertion printed
2021-10-07 15:26:34 WARN 4092 --- [nio-8080-exec-1]
com.programming.itjobspro.controller: warn log assertion printed
2021-10-07 15:26:34 ERROR 4092 --- [nio-8080-exec-1]
com.programming.itjobspro.controller: error log assertion printed
Logging Patterns
With the intention to change the logging sample of the applicaiton, that you must edit the utility.properties file and add the next strains of code in there.# Logging sample for the console
logging.sample.console=%d{yyyy-MM-dd HH:mm:ss} - %msgpercentn
# Logging sample for file
logging.sample.file=%d{yyyy-MM-dd HH:mm:ss} [%thread] %-5level %logger{36} - %msgpercentnAfter working the appliance, we are able to see the next output.2021-10-07 15:26:34 - It is a debug message
2021-10-07 15:26:34 - That is an information message
2021-10-07 15:26:34 - It is a warn message
2021-10-07 15:26:34 - That is an error messageShip the logging output to logging file through the use of the logging.path.2021-10-07 15:26:34 - It is a debug message
2021-10-07 15:26:34 - That is an information message
2021-10-07 15:26:34 - It is a warn message
2021-10-07 15:26:34 - That is an error message]Logging output file.
To print the logs within the file, use the logging.file or logging.path property.logging.file=C:/Customers/Programmers/application-debug.logSo see the output within the following diagram.2021-10-07 15:26:34 DEBUG 4092 --- [http-nio-8080-exec-1]com.programming.itjobspro.controller : It is a debug message
2021-10-07 15:26:34 INFO 4092 --- [http-nio-8080-exec-1] com.programming.itjobspro.controller : That is an information message
2021-10-07 15:26:34 WARN 4092 --- [http-nio-8080-exec-1] com.programming.itjobspro.controller : It is a warn message
2021-10-07 15:26:34 ERROR 4092 --- [http-nio-8080-exec-1] com.programming.itjobspro.controller : That is an error messageColoration-coded log output
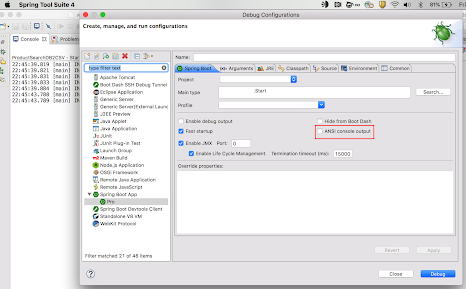
To reinforce the readability of the logging output of your utility, we are able to use the color-coded outputs. Solely you need to do is,
allow the ANSI which is proven within the under. Word This can be fluctuate acccording to your IDE and right here used the intellij IDE.colour coding is configured utilizing %clr conversion phrase.
- Deadly Error - Pink
- Warn - Yellow
- Data, Debug and hint - Inexperienced
Particular Logging Configuration.
Inside one utility, we are able to have a number of configurations. So you may obtain this by creating a number of application-{profile}.properties information in the identical location of applicaiton.properties file.Lets assume that your utility has a number of environments with having dev and prod. Then you may create two profile particular properties.
Utility-prod.properties.
logging.degree.com.howtodoinjava=ERROR
logging.sample.console=%d{yyyy-MM-dd HH:mm:ss} - %msgpercentnapplication-dev.properties.
logging.degree.com.howtodoinjava=DEBUG
logging.sample.console=%d{yyyy-MM-dd HH:mm:ss} - %msgpercentnWith the intention to move the profile info to utility, spring-profile.lively is handed to
runtime.$ java -jar -Dspring.profiles.lively=prod spring-boot-demo.jarThat is all about the way to set the logging degree with utility.properties in Spring Boot
utility. This is essential matter as that you must preserve excessive readability in your
code and in addition if there may be an error occur, that you must know what precisely going with
your utility.
Hope you perceive the tutorial properly and see you within the subsequent tutorial.
Till then bye!