


Are you involved in regards to the security of your digital machines (VMs)? An unexpected catastrophe might trigger the lack of essential knowledge in your group. However fear no extra! With Veeam on Home windows or Linux, you possibly can defend your essential knowledge, functions, and techniques.
Veeam Backup gives an answer for knowledge backing, replication, and restoration performance. And on this tutorial, you’ll be taught to make use of Veeam Backup to again up and restore your knowledge.
Dive in, so that you by no means have to fret about shedding your knowledge!
Stipulations
This tutorial comprises hands-on demonstrations. To observe alongside, make certain you’ve gotten the next:
- A hypervisor put in – This tutorial makes use of Hyper-V, however VMware Workstation and different variations of hypervisors can be utilized.
- VMs working visitor working techniques (OS) – This tutorial makes use of two VMs, every working Microsoft Home windows and Linux working techniques.
Downloading and Putting in Veeam on Home windows and Linux
Veeam Backup is suitable with many backup targets and works with VMware vSphere and Microsoft Hyper-V. However like different software program, you could first obtain and set up the Veeam Backup & Replication utility.
For this tutorial, you’ll obtain and set up Veeam Backup & Replication 9.5 for the Home windows atmosphere with the next steps:
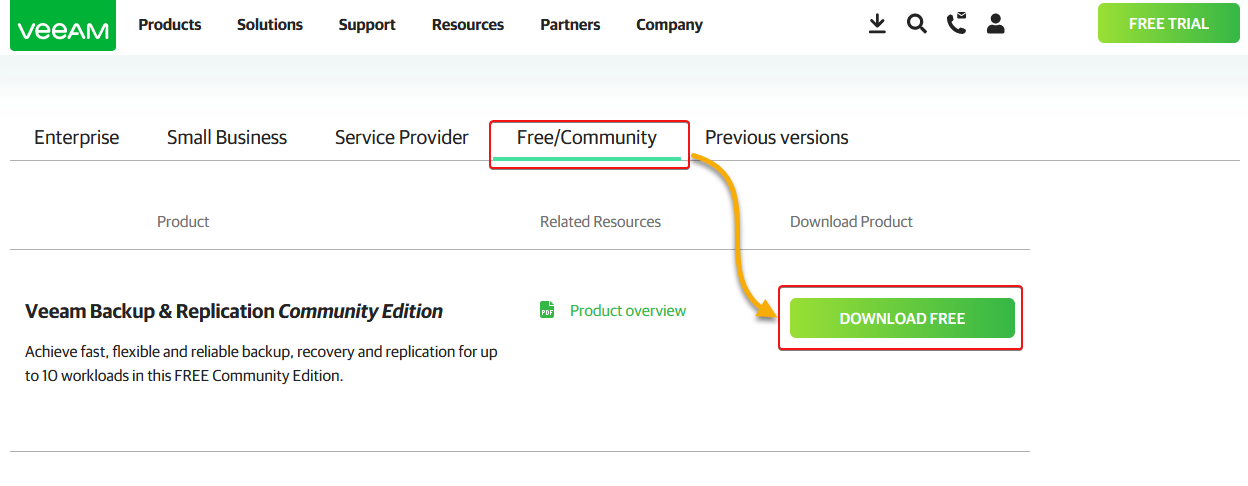
1. Open your favourite net browser, go to the Veeam web site, and click on Downloads (upper-right) to see out there software program variations.

2. Subsequent, navigate to the Free/Neighborhood tab, search for the Veeam Backup & Replication Neighborhood Version, and click on DOWNLOAD FREE to obtain the software program.
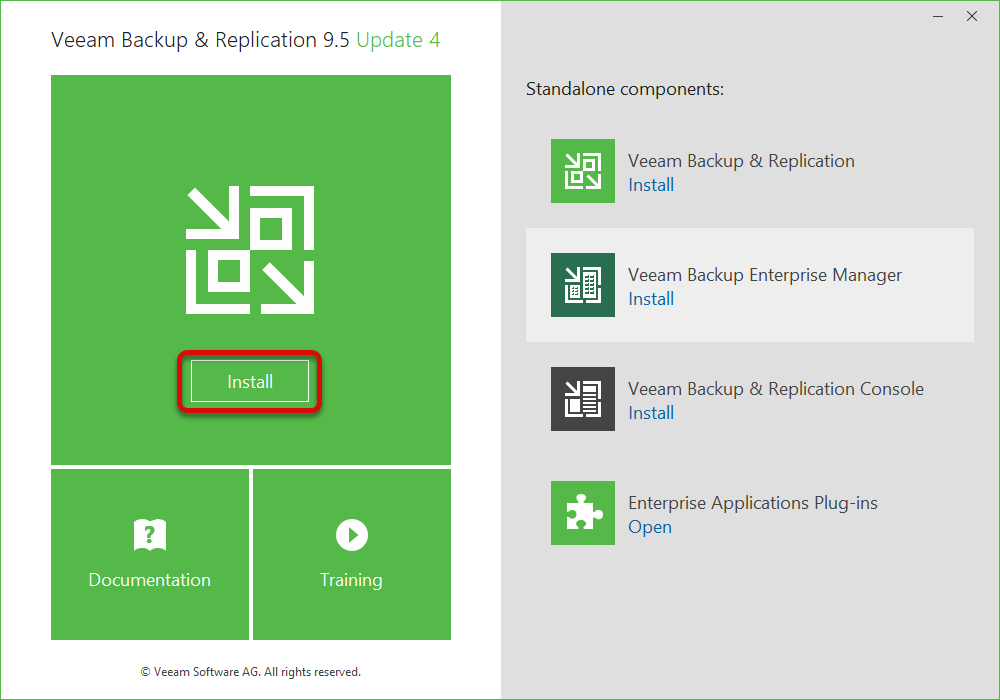
3. As soon as downloaded, run the Veeam setup file to launch the set up wizard.

4. Now, click on Set up to start out the Veeam Backup & Replication setup.
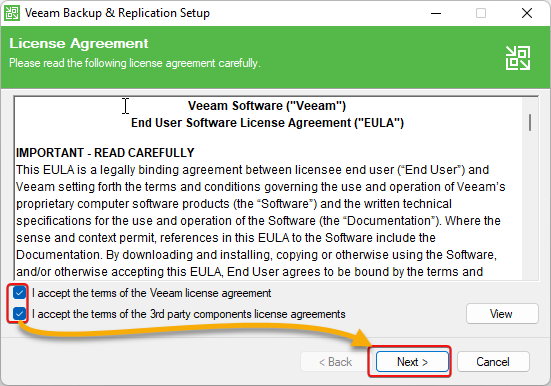
5. Tick on the checkboxes to simply accept the Finish Person License Settlement (EULA), and click on Subsequent.
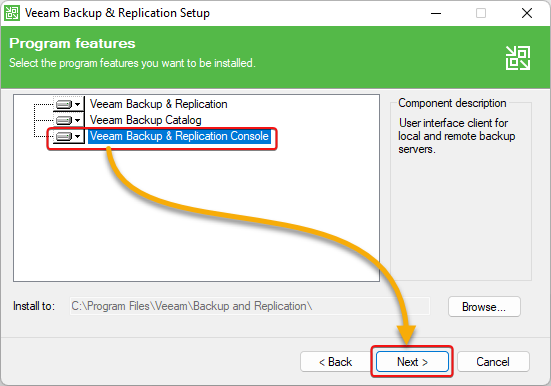
6. Choose the choice for putting in Veeam Backup & Replication Console, and click on Subsequent.
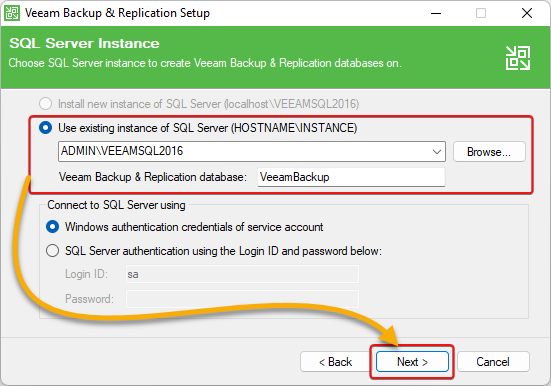
7. Subsequent, select whether or not to put in Microsoft SQL Server Specific, use an present Microsoft SQL Server, or use a distant Microsoft SQL Server, and click on Subsequent.
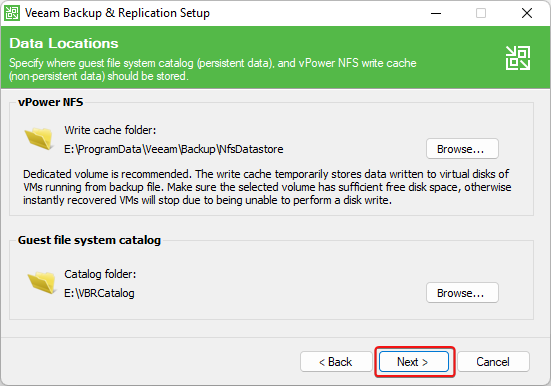
8. Select the Information Areas choices you like, and click on Subsequent.
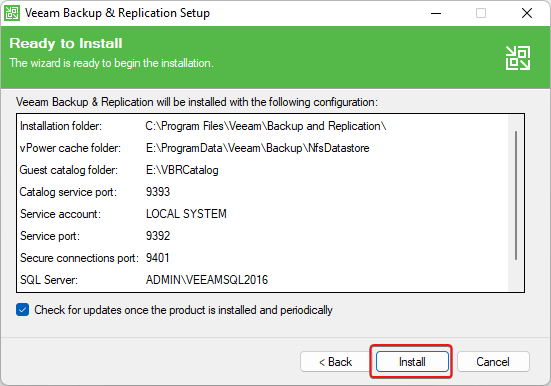
9. Evaluation your picks and click on Set up to start out the set up.
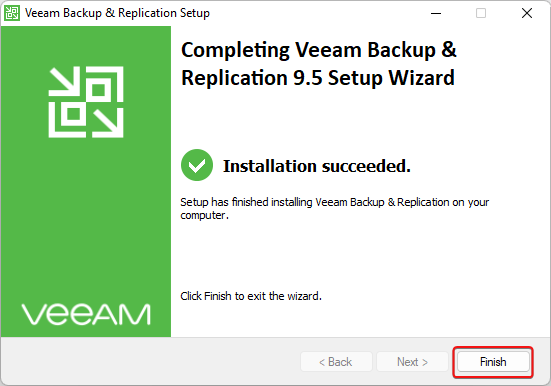
10. As soon as put in, click on End to exit the wizard.
Configuring a Backup Repository
With Veeam Backup put in in your system, you could configure the Veeam backup repository earlier than you can begin backing up your knowledge. The backup repository is the storage location the place Veeam Backup shops the backup recordsdata.
To configure a backup repository, observe the under steps:
1. Launch the Veeam Backup & Replication console, and choose the BACKUP INFRASTRUCTURE possibility (left pane), as proven under.
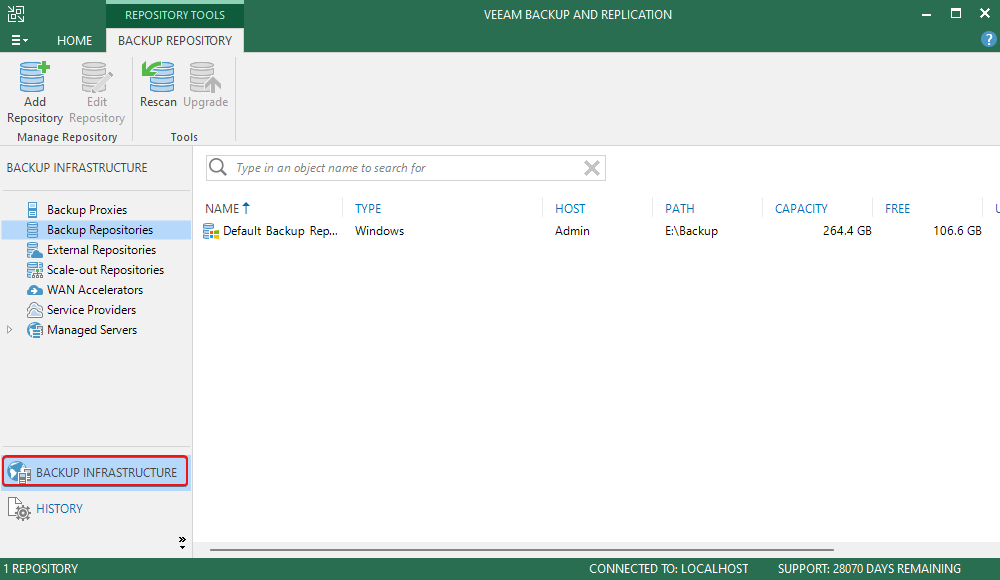
2. Subsequent, right-click on Backup Repositories, and click on Add Backup Repository within the ribbon toolbar to open the Add Backup Repository wizard.

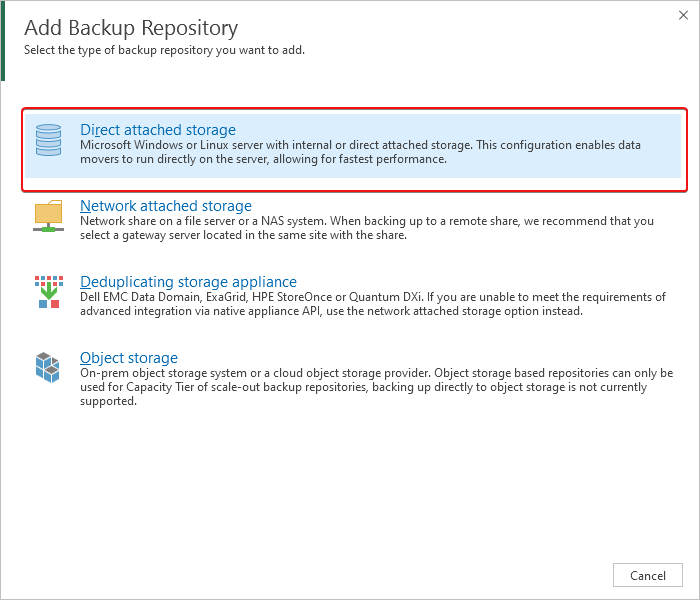
3. On the Add Backup Repository window, choose the backup repository kind. This tutorial makes use of the Direct connected storage possibility.
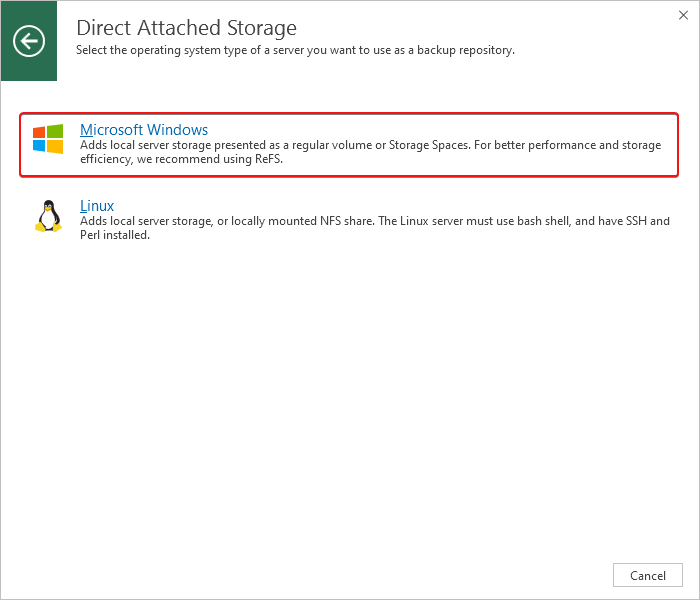
4. Now, choose the server OS to make use of, both Microsoft Home windows or Linux) because the backup repository location, and the New Backup Repository window will seem.
Be aware that if you choose Microsoft Home windows, you could enter the server title, IP tackle, and credentials to entry it.
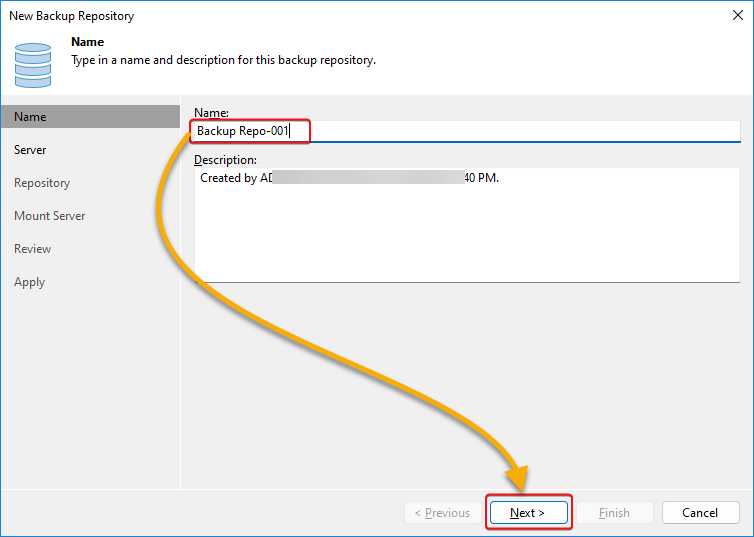
5. Within the Title tab, enter your most well-liked Title in your repository, and click on Subsequent.
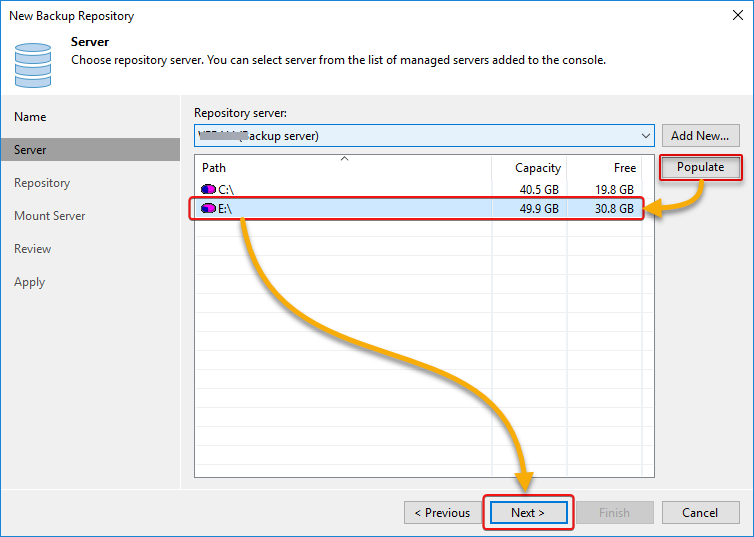
6. Subsequent, click on Populate to load the native disks performing as repository server storage, choose your required native disk, and click on Subsequent.
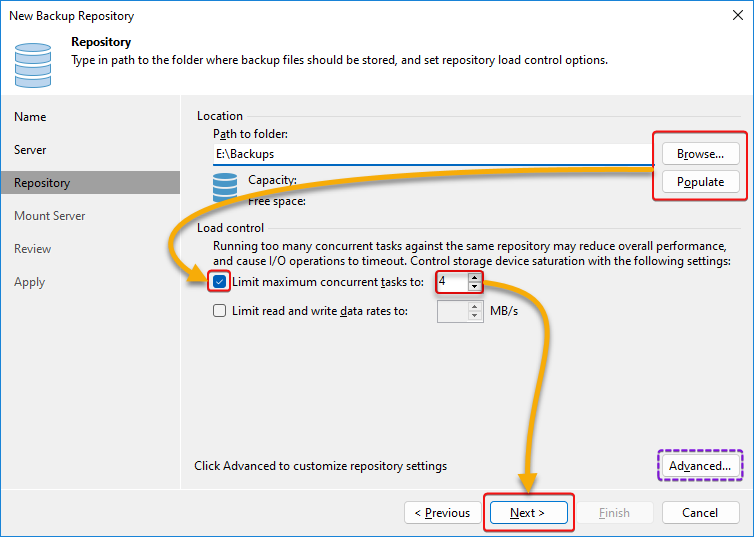
7. Configure the repository settings with the next:
- Click on Browse to decide on a backup location or Populate to load the server’s native disks, the place you possibly can specify the backup storage location.
- Tick the Restrict most concurrent duties, and specify the utmost worth. This selection ensures you’ve gotten restricted the variety of duties Veeam cab creates throughout knowledge safety or catastrophe restoration jobs. The utmost worth will depend upon the kind of backup chains saved within the backup repository.
Optionally, click on Superior to configure the superior settings to allow knowledge compression, encryption, and storage optimization.
As soon as configured, click on Subsequent to mount a brand new server.
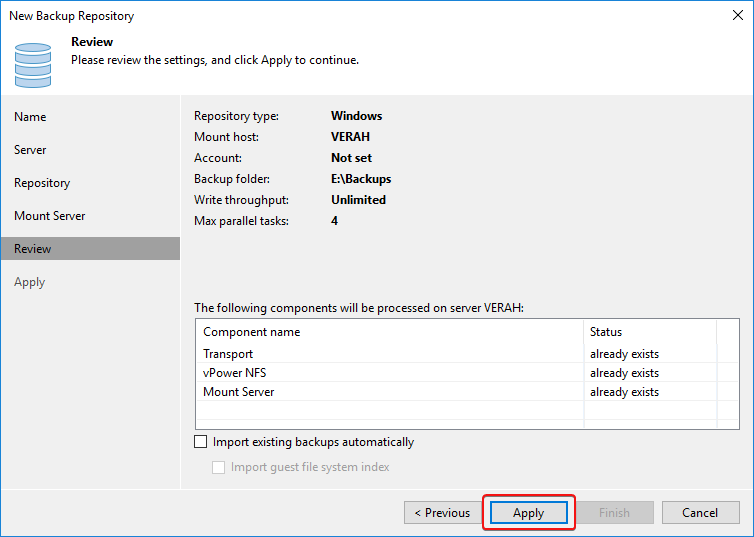
8. Evaluation the abstract of your repository configuration, and click on Apply to create the backup repository.
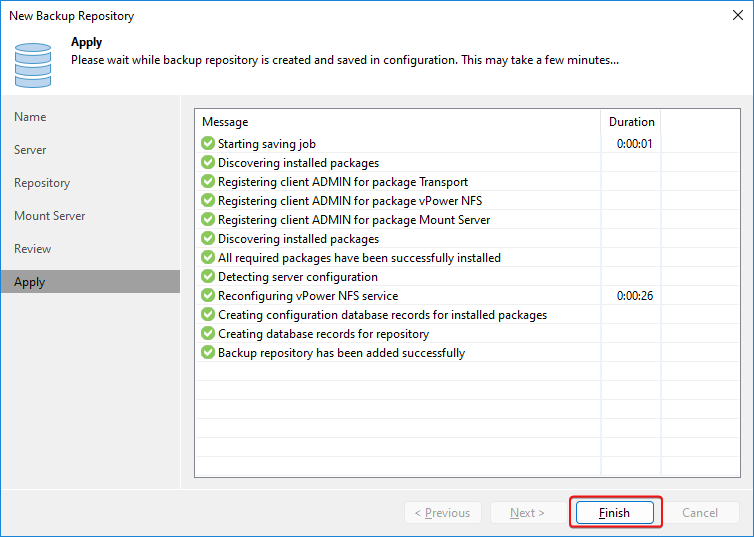
9. Lastly, click on End to finish to shut the New Backup Repository window.
As soon as the repository has been configured, you possibly can retailer backup recordsdata and carry out backup and restore operations.
Often checking the repository is strongly beneficial to make sure sufficient free house and backups are appropriately saved.
Creating and Working a Backup Job
After efficiently configuring a backup repository, you might be prepared to check Veeam’s knowledge backup capabilities. How? You’ll create and run a backup job to start out backing up your knowledge.
To create a backup job, observe these steps:
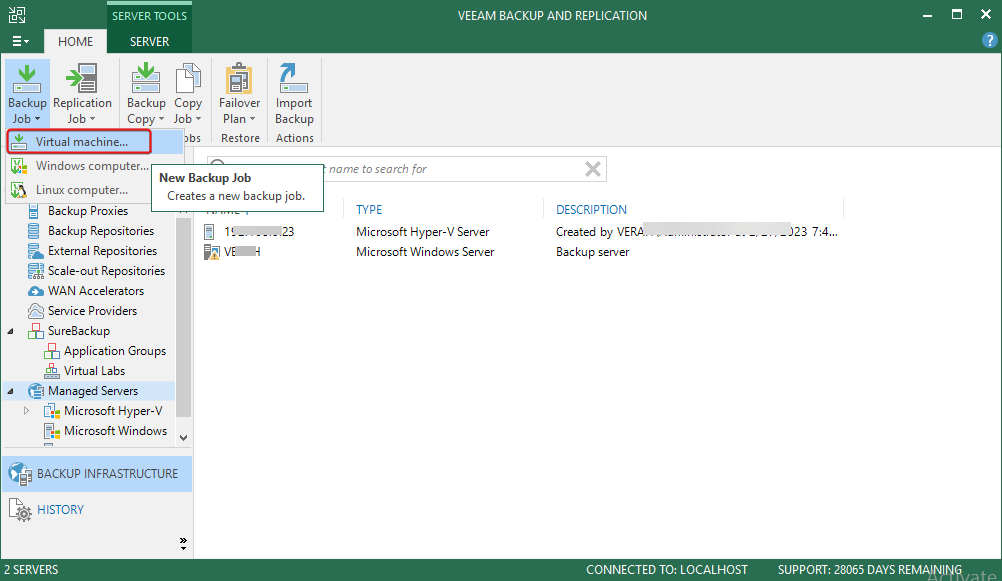
1. Navigate to the House tab, click on Backup Job, and choose Digital machine to open the New Backup Job wizard.
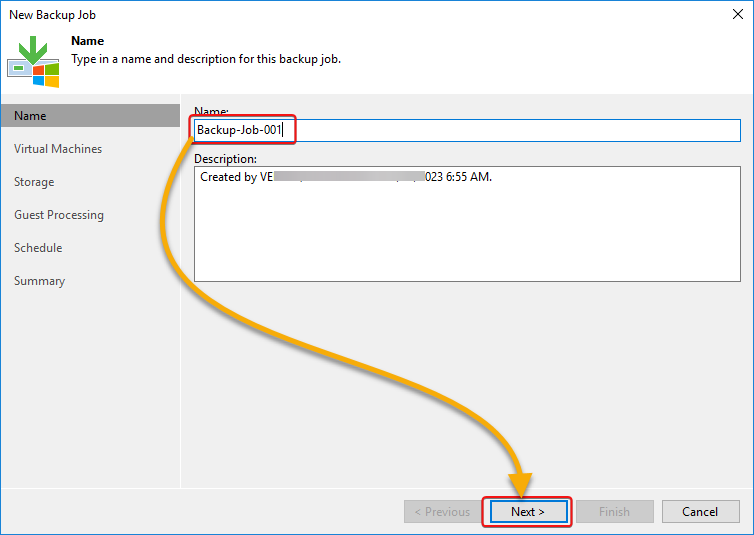
2. On the New Backup Job window, enter a Title in your backup job and an outline (elective), and click on Subsequent.
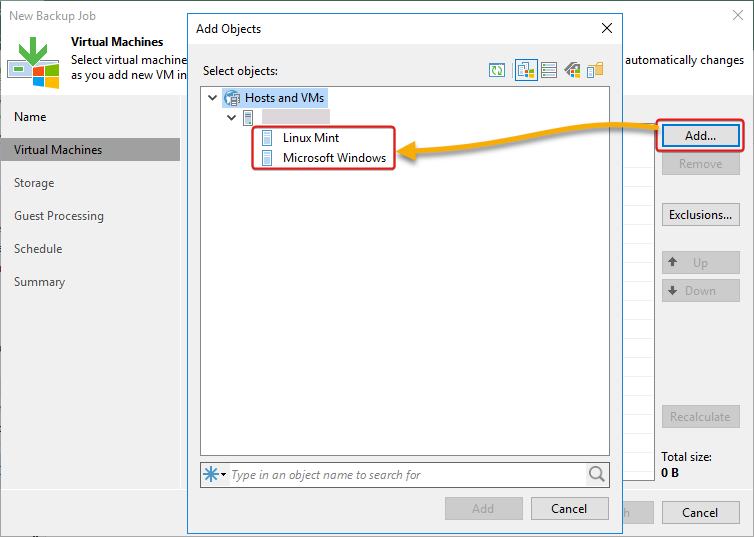
3. Subsequent, click on Add (opens the Add Objects window), choose the VMs to incorporate within the backup job, and click on Subsequent.
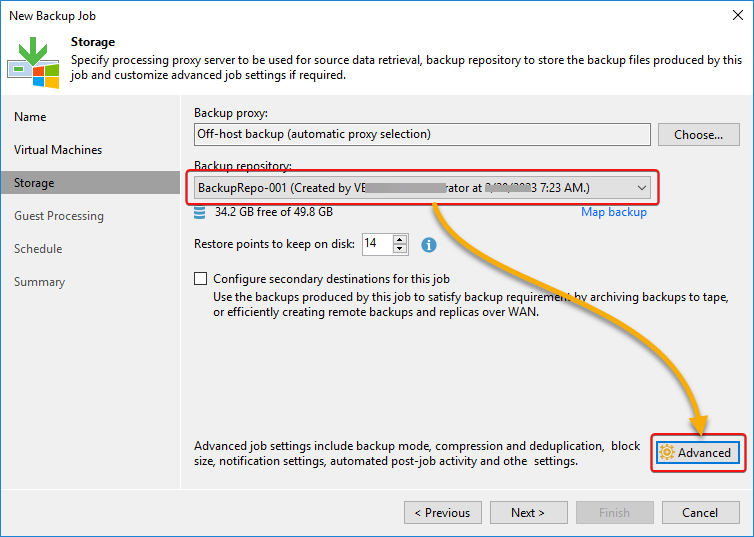
4. Now, select a Backup repository vacation spot, which you configured within the “Configuring a Backup Repository” part, from the drop-down area, and click on Superior.
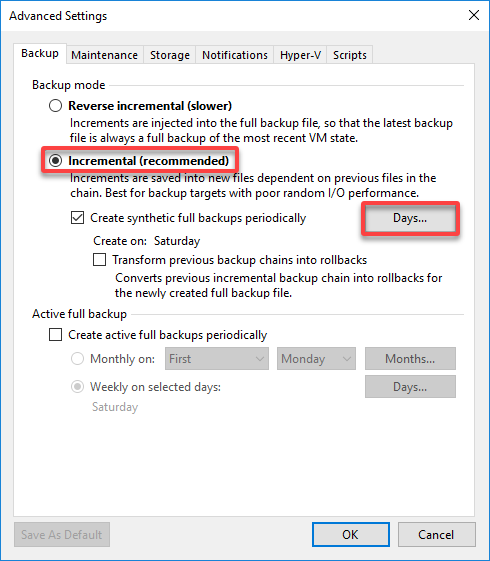
5. Within the Superior Settings window, set the backup schedule with the next:
- Select the Backup mode – This tutorial makes use of Incremental, which is beneficial.
- Click on Days to pick out the times and instances for the backup to run.
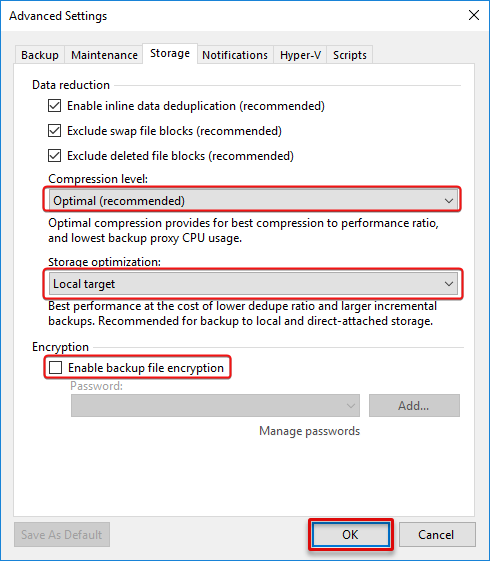
6. Navigate to the Storage tab, configure any superior settings you require, and click on OK to return to the New Backup Job window.
The superior settings you possibly can configure embody however should not restricted to retention insurance policies, compression and encryption choices, and community visitors throttling.
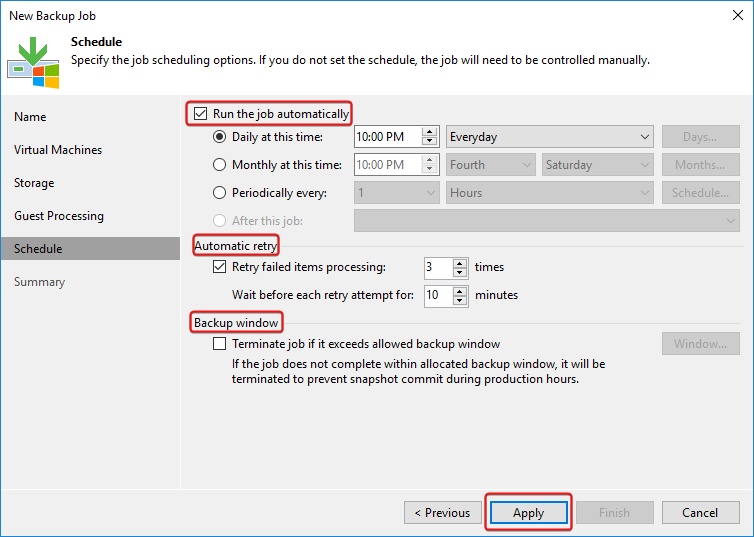
7. Underneath the Schedule tab, specify the job scheduling choices you require, and click on Apply button to save lots of and apply your chosen settings.
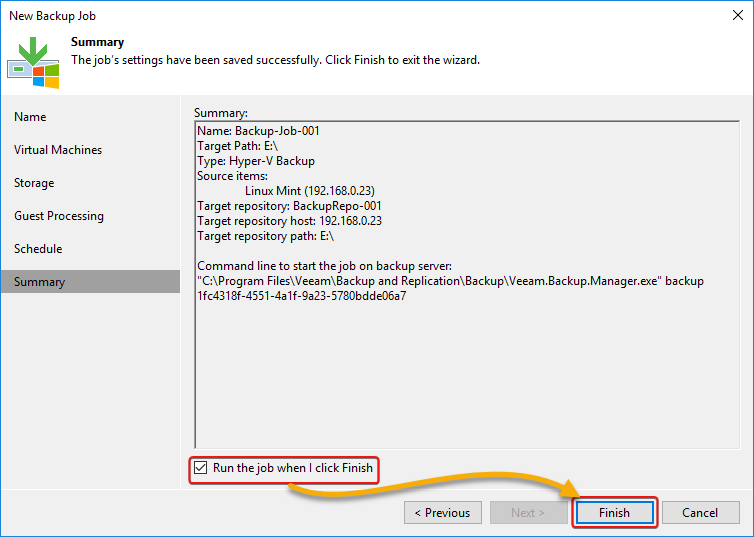
8. Lastly, evaluate your backup job settings and click on End to create the job.
You’ll be able to both tick on the checkbox under to run the job after closing the New Backup Job window or run it manually later.
Should you select to run the backup job manually, navigate to the JOB ribbon tab, right-click on the job within the desk listing, and choose Begin.
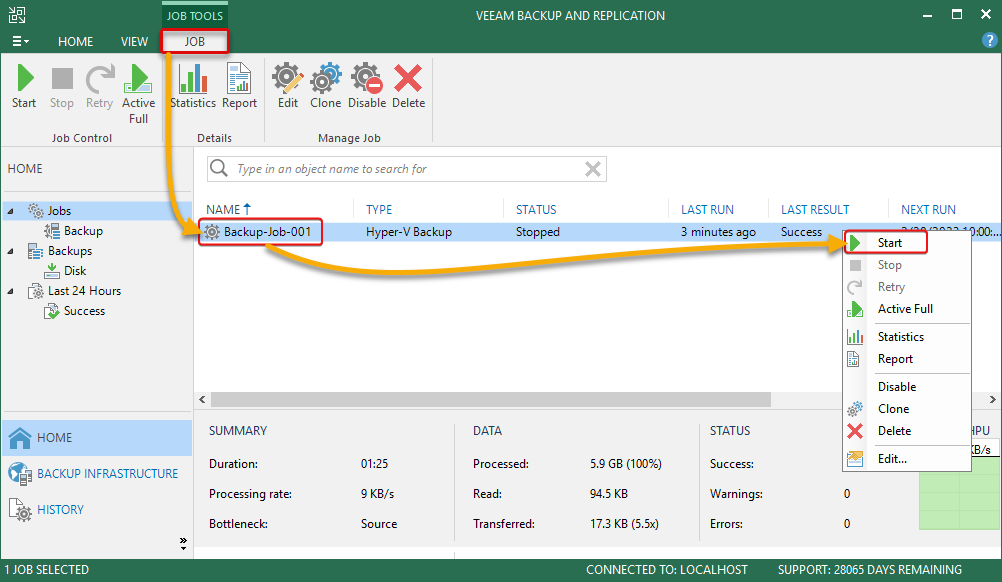
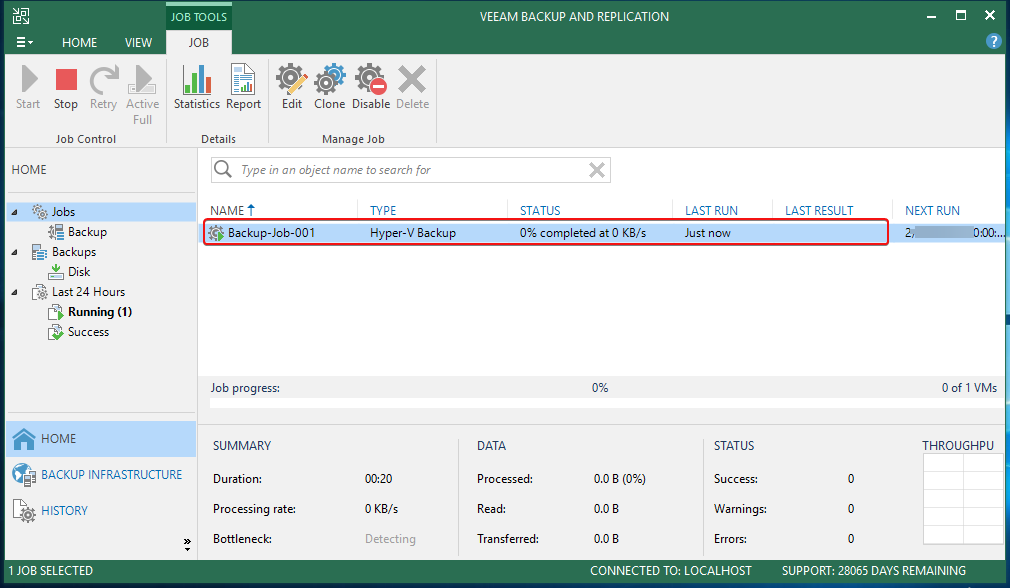
As you possibly can see under, you possibly can monitor the progress of the backup job within the JOBS ribbon tab.
Congratulations! Your backup job is now working, so relaxation assured that your knowledge is protected.
Restoring Backed Up Information
An unforeseeable catastrophe might be catastrophic, inflicting you to lose essential knowledge. However the excellent news is that Veeam Backup for Home windows and Linux allows you to restore knowledge from a backup you created,
To revive backed-up knowledge, observe the under steps:
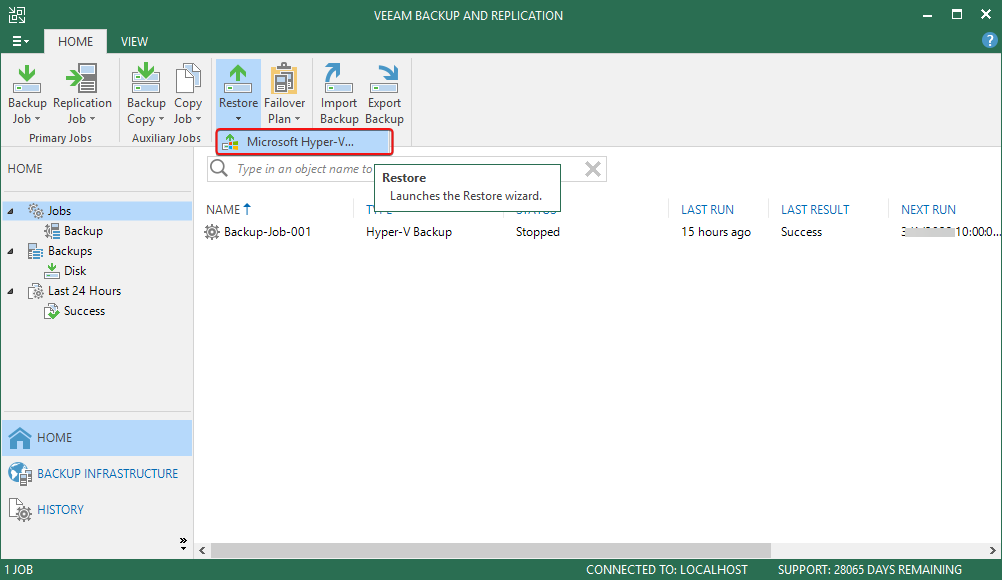
1. Navigate to the House tab, click on Restore, and choose the Microsoft Hyper-V choice to open the Restore wizard.
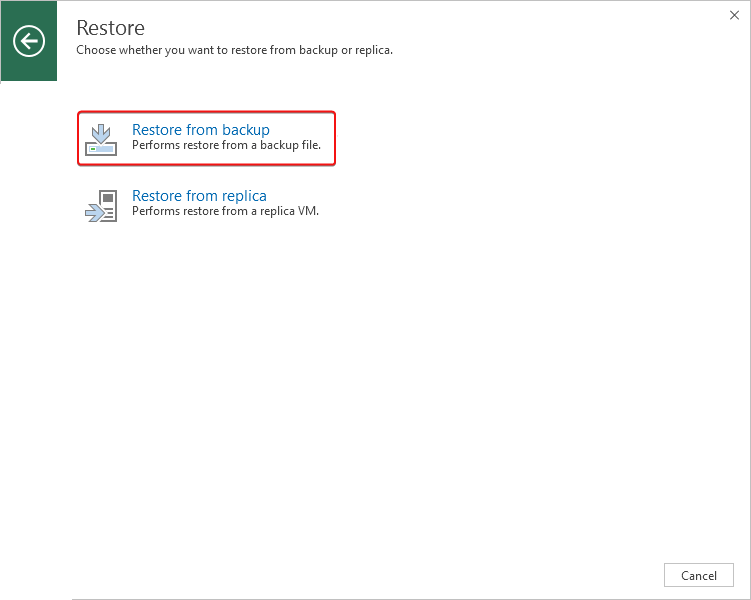
2. Subsequent, choose the place to revive knowledge, whether or not from a reproduction or a backup file. On this instance, select Restore from backup since you’ve gotten a backup job working.
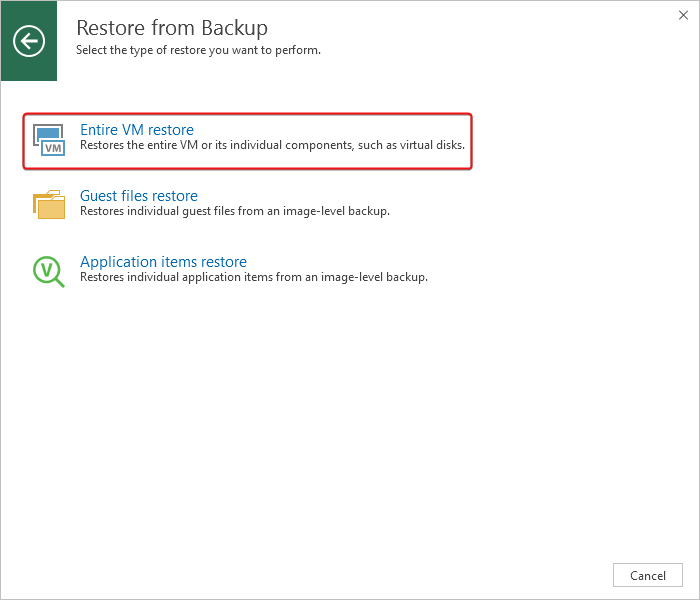
3. Select the restore kind you wish to carry out. However on this instance, select Whole VM restore since you might be restoring VM knowledge.
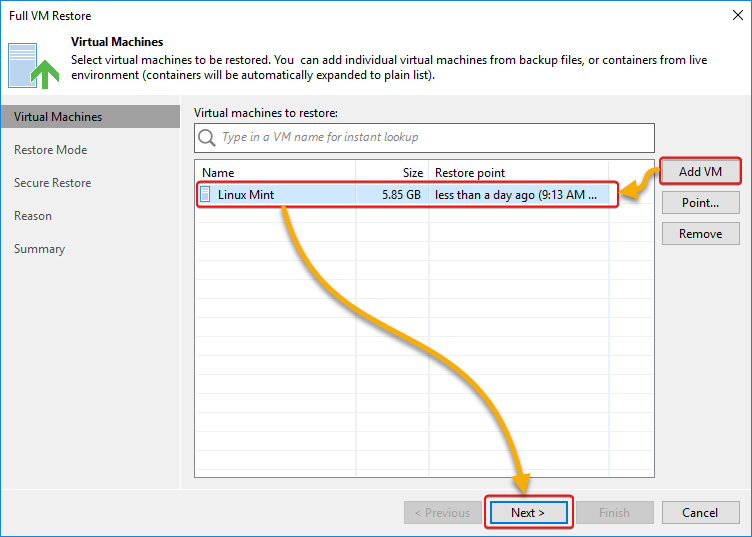
4. Now, click on Add VM button to load the VM restore level, choose a restore level, and click on Subsequent.
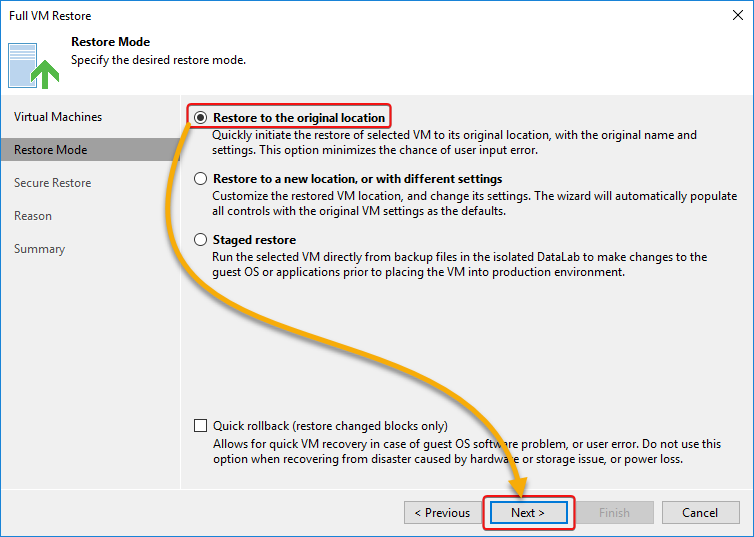
5. Choose the specified restore mode, and click on Subsequent.
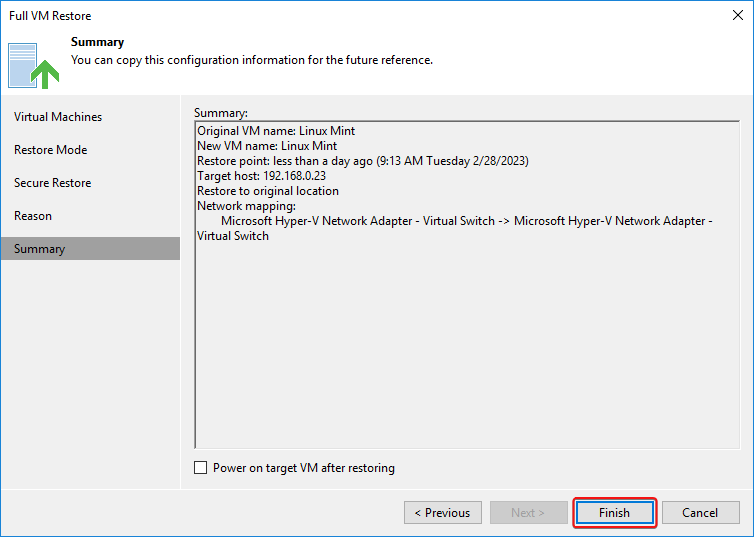
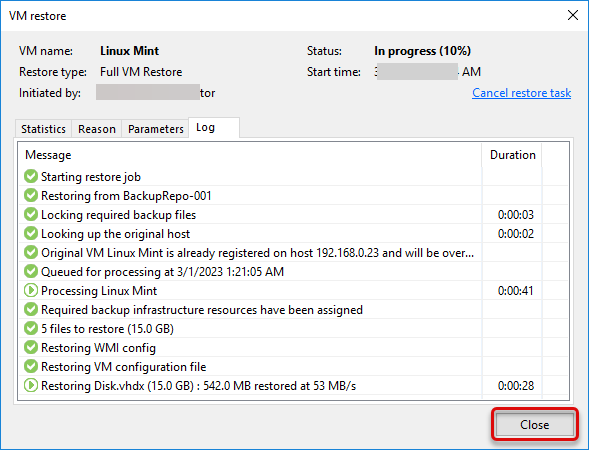
6. Subsequent, evaluate the settings and click on End to start out the restore course of.
7. Await the restore course of to finish, and click on Shut.
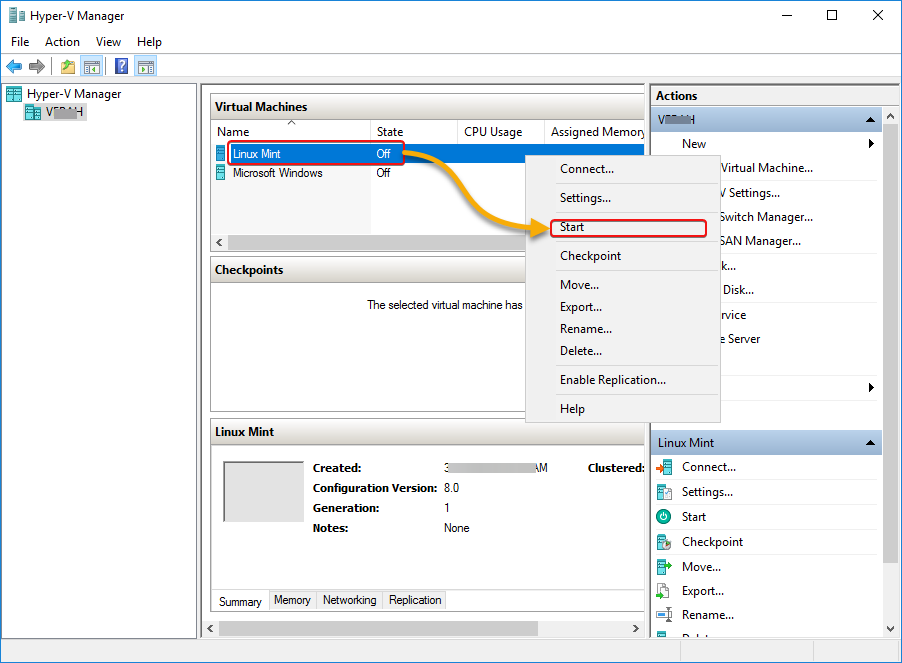
8. Lastly, launch your hypervisor (i.e., Hyper-V), search for and begin your VM to confirm the restored knowledge.
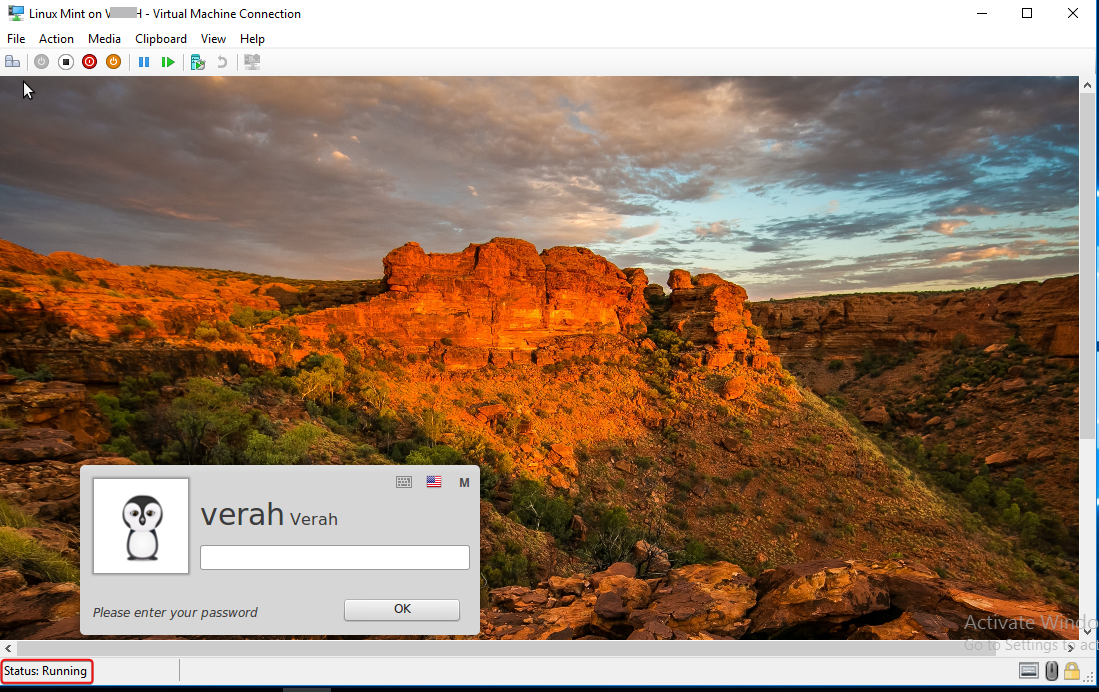
Upon beginning your VM, test whether or not all parts are working easily and your recordsdata are current.
Conclusion
On this tutorial, you’ve gotten discovered find out how to again up and restore knowledge by way of Veeam Backup efficiently. Retaining knowledge safe has been a particular think about sustaining companies in good condition, and Veeam on Home windows and Linux is among the greatest software program to care for your knowledge.
Now, you’ve gotten a fail-safe in your knowledge if an unexpected catastrophe comes your manner!
Why not construct up your data by exploring Veeam Backup for cloud environments like AWS and Microsoft Azure? Or maybe discover find out how to defend Veeam Backup towards cyber threats similar to ransomware and malware?