


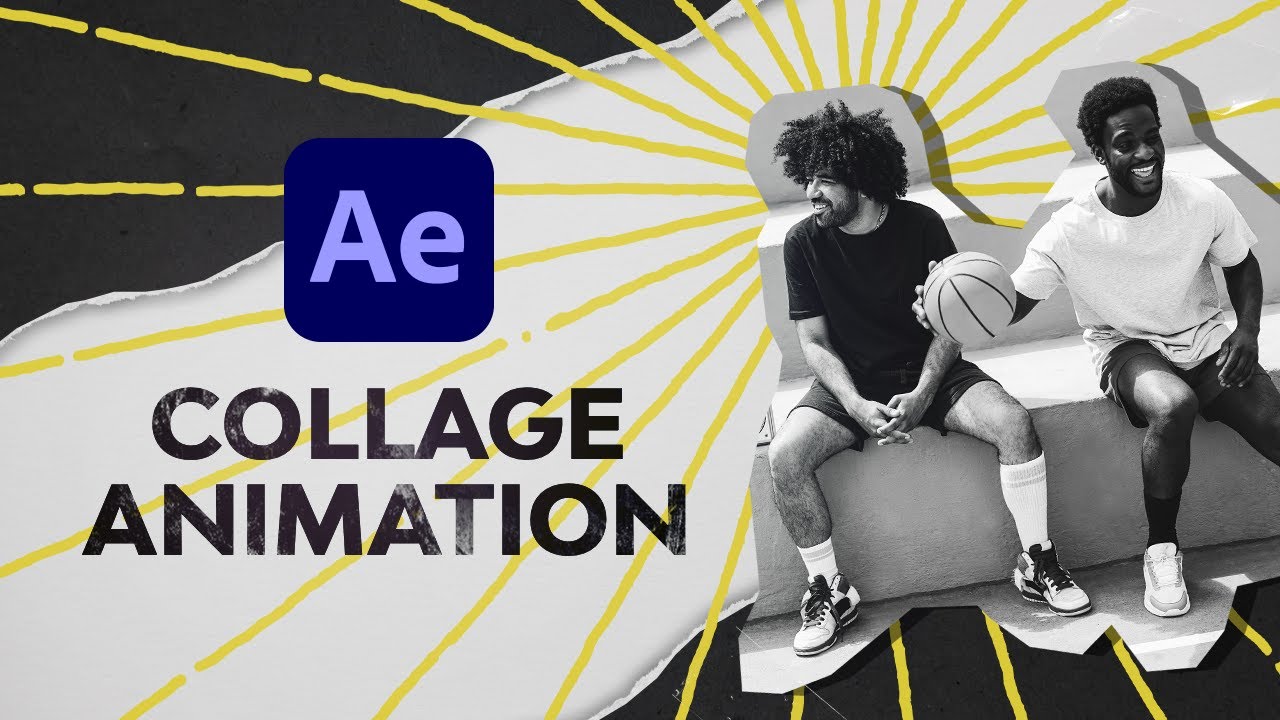
Discover ways to make a collage animation in After Results with this in-depth, step-by-step information, in simply over an hour.
Soar to content material on this part:
What You will Be taught: Making an After Results Collage Animation
- use rotoscoping to create a number of layers
- create mixing results
- movement observe
- add and use 3D belongings
- use the Keylight impact in After Results
- make a cease movement fashion collage animation in After Results
1. Introduction
1.1 Recreate This Collage Impact!
Take a look at this fast, one minute lengthy introduction video to see what you may be studying, the inventive course of that’ll result in your video collage animation in After Results, and find out how to put all of it collectively.
2. Getting Began
2.1 Getting Began in After Results
Watch video lesson (2 minutes) ↗
I am going to present you find out how to arrange your composition, together with find out how to create some preliminary movement by including a null object, in order that we do not have to animate the identical motion with each different asset that we put into the composition. I am going to go into extra element about null objects within the subsequent lesson.


3. Making a Background
3.1 Creating the Base Layer With Null Objects
Watch video lesson (5 minutes) ↗
I am going to present you find out how to add, resize, title, and order a few of the issues that we’ll embrace within the After Results picture collage animation. To get this stuff shifting from proper to left – following the motion Null Object we made within the final lesson – we have to take the choose whip and drag it over to the motion layer to create layers which are ‘parented.’ Don’t be concerned, this sounds extra difficult than it’s and you’ll observe together with me on this five-minute video.


Animate in After Results
Obtained the collage bug? Strive Dave Bode’s complete and free After Results course. If you wish to discover ways to create a photograph collage with animation in After Results then you definitely’ll discover the following pointers and tips important.
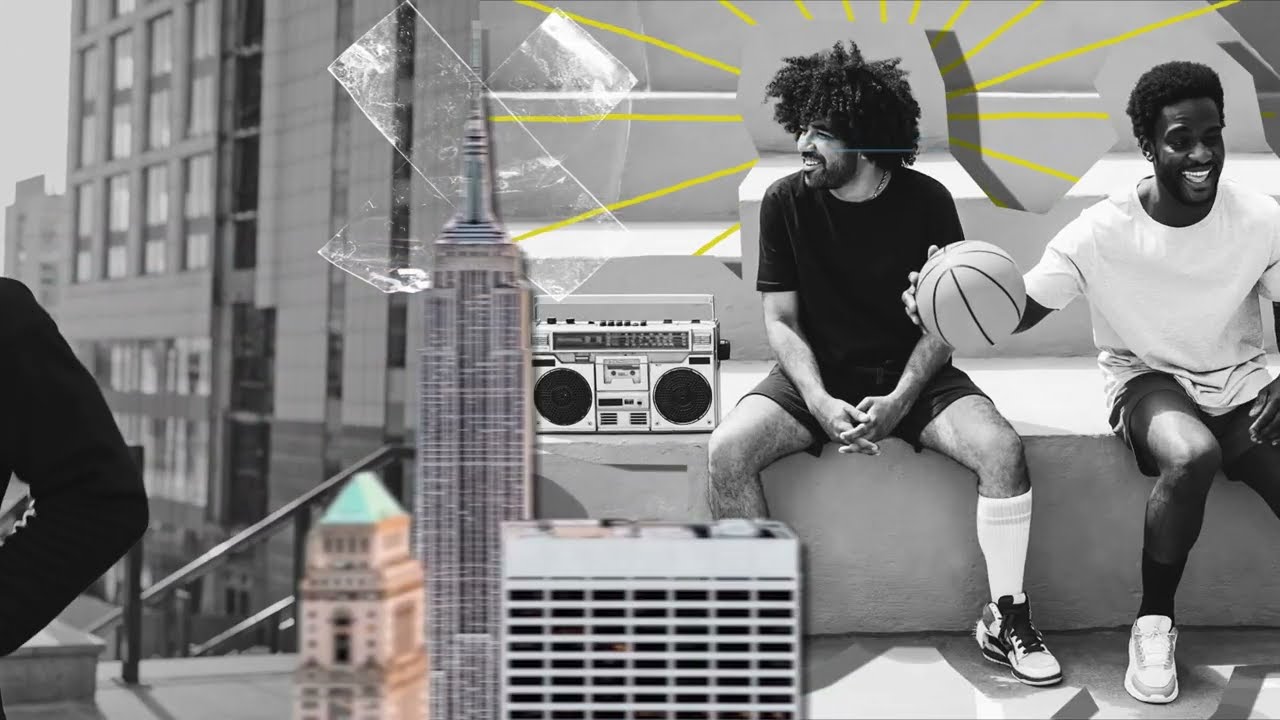
4. Making Your Photograph Collage Animation in After Results
4.1 Starting the Collage Impact
Watch video lesson (3 minutes) ↗
Right here, we’ll get into creating that collage impact. I am going to present you a few of my thought course of, like selecting factors in footage that work higher to transition by way of to the subsequent, and find out how to modify them in order that they circulate seamlessly fairly than trying like particular person belongings.


4.2 Rotoscoping to Create A number of Layers in Your Animation
Watch video lesson (8 minutes) ↗
I am going to present you find out how to rotoscope effectively, working solely on the components of footage you may be utilizing fairly than the entire clip.
Rotoscoping or Roto, is a way of hand-drawing a masks to isolate a topic in your footage, body by body. This may then be animated independently from the remainder of the unselected footage.
You will discover ways to separate a topic after which add animation between that remoted topic and the background.


Rotoscoping in After Results
1
Choose Your Footage
Double-click in Timeline to open the layer in its personal panel.
2
Choose the Roto Brush Instrument
Use choice/Alt+W for the Roto software
3
Brush Over Topic
Holding Management or Command whereas clicking and dragging your mouse, paint over the factor you need to isolate.
“The entire aesthetic is to make issues look a little bit bit thrown collectively, textual.”
5. Finish Display CTA
5.1 Making a Name-To-Motion Finish Display Animation
Watch video lesson (12 minutes) ↗
On this lesson we’ll mix a few of the belongings we have beforehand used whereas making our After Results collage animation, along with some new ones to make a tough, funky trying scene on which to position some call-to-action textual content.


6. Including Parts and Results
6.1 Including Foreground Parts to the Collage Animation in After Results
Watch video lesson (5 minutes) ↗
Should you’ve made it thus far in our collage animation tutorial in After Results, you may have an important base. Now we have to cowl joins or gaps, and to assist usher in some depth and texture, so I am going to present you ways to do this on this lesson.


6.2 Utilizing 3D Property in After Results
Watch video lesson (5 minutes) ↗
Including 3D belongings means you may spin one thing round to any angle that you really want and create a hi-res PNG of that angle. On this lesson we’ll have a look at how and the place you may seize these belongings after which find out how to set them up in After Results so you may modify issues just like the body charge.


6.3 After Results Inexperienced Display With the Keylight Impact
Watch video lesson (5 minutes) ↗
We touched on utilizing Keylight earlier however I am going to undergo that in additional element on this five-minute video. I am going to present you ways you should use massive blocks of color in footage as a form of inexperienced display screen, and key that out with Keylight.
You will actually get a way of how one can add some cool little results to provide the entire piece extra curiosity and add some enjoyable!
7. Ending Up
7.1 Including Some Remaining Touches
Watch video lesson (5 minutes) ↗
By now you must have a very cool trying collage video with a number of totally different parts occurring. On this remaining lesson, we’ll have a look at including some final little prospers to actually end your undertaking off in fashion.
Take After Results Additional
Be taught extra about After Results animation, compositing in After Results and rather more, with our free programs.
Should you favor to study differently, you can strive our After Results tutorials, we have an enormous library of free Adobe After Results tutorials to get you began together with movement graphics tutorials and previous collage animation After Results templates.