


Python is a superb programming language, however packaging is certainly one of its weakest factors. It’s a well-known reality in the neighborhood. Putting in, importing, utilizing and creating packages has improved so much over time, however it’s nonetheless not on par with newer languages like Go and Rust that realized so much from the struggles of Python and different mature languages.
On this tutorial, you will be taught all the pieces you must learn about writing, packaging and distributing your individual packages.
The way to Write a Python Library
A Python library is a coherent assortment of Python modules that’s organized as a Python bundle. Normally, that signifies that all modules dwell underneath the identical listing and that this listing is on the Python search path.
Let’s shortly write a bit of Python 3 bundle and illustrate all these ideas.
The Pathology Bundle
Python 3 has a superb Path object, which is a big enchancment over Python 2’s awkward os.path module. However it’s lacking one essential functionality—discovering the trail of the present script. This is essential whenever you wish to find entry recordsdata relative to the present script.
In lots of instances, the script will be put in in any location, so you possibly can’t use absolute paths, and the working listing will be set to any worth, so you possibly can’t use a relative path. If you wish to entry a file in a sub-directory or dad or mum listing, you should be capable to determine the present script listing.
Right here is the way you do it in Python:
import pathlib

script_dir = pathlib.Path(__file__).dad or mum.resolve()
To entry a file known as ‘file.txt’ in a ‘knowledge’ sub-directory of the present script’s listing, you should use the next code: print(open(str(script_dir/'knowledge/file.txt').learn())
With the pathology bundle, you’ve a built-in script_dir technique, and you utilize it like this:
from pathology.Path import script_dir

print(open(str(script_dir()/'knowledge/file.txt').learn())
Yep, it is a mouthful. The pathology bundle may be very easy. It derives its personal Path class from pathlib’s Path and provides a static script_dir() that all the time returns the trail of the calling script.
Right here is the implementation:
import pathlib
import examine

class Path(kind(pathlib.Path())):
    @staticmethod
    def script_dir():
        print(examine.stack()[1].filename)
        p = pathlib.Path(examine.stack()[1].filename)
        return p.dad or mum.resolve()
As a result of cross-platform implementation of pathlib.Path, you possibly can derive instantly from it and should derive from a particular sub-class (PosixPath or WindowsPath). The script_dir decision makes use of the examine module to seek out the caller after which its filename attribute.
Testing the Pathology Bundle
Everytime you write one thing that’s greater than a throwaway script, it is best to take a look at it. The pathology module isn’t any exception. Listed here are the assessments utilizing the usual unit take a look at framework:
import os
import shutil
from unittest import TestCase
from pathology.path import Path


class PathTest(TestCase):
    def test_script_dir(self):
        anticipated = os.path.abspath(os.path.dirname(__file__))
        precise = str(Path.script_dir())
        self.assertEqual(anticipated, precise)

    def test_file_access(self):
        script_dir = os.path.abspath(os.path.dirname(__file__))
        subdir = os.path.be a part of(script_dir, 'test_data')
        if Path(subdir).is_dir():
            shutil.rmtree(subdir)
        os.makedirs(subdir)
        file_path = str(Path(subdir)/'file.txt')
        content material="123"
        open(file_path, 'w').write(content material)
        test_path = Path.script_dir()/subdir/'file.txt'
        precise = open(str(test_path)).learn()

        self.assertEqual(content material, precise)
The Python Path
Python packages have to be put in someplace on the Python search path to be imported by Python modules. The Python search path is a listing of directories and is all the time accessible in sys.path. Right here is my present sys.path:
>>> print('n'.be a part of(sys.path))

/Customers/gigi.sayfan/miniconda3/envs/py3/lib/python36.zip
/Customers/gigi.sayfan/miniconda3/envs/py3/lib/python3.6
/Customers/gigi.sayfan/miniconda3/envs/py3/lib/python3.6/lib-dynload
/Customers/gigi.sayfan/miniconda3/envs/py3/lib/python3.6/site-packages
/Customers/gigi.sayfan/miniconda3/envs/py3/lib/python3.6/site-packages/setuptools-27.2.0-py3.6.egg
Be aware that the primary empty line of the output represents the present listing, so you possibly can import modules from the present working listing, no matter it’s. You may instantly add or take away directories to/from sys.path.
It’s also possible to outline a PYTHONPATH setting variable, and there a couple of different methods to regulate it. The usual site-packages is included by default, and that is the place packages you put in utilizing through pip go.
The way to Bundle a Python Library
Now that we have now our code and assessments, let’s bundle all of it into a correct library. Python supplies a simple method through the setup module. You create a file known as setup.py in your bundle’s root listing.
The setup.py recordsdata consists of a whole lot of metadata info comparable to creator, license, maintainers, and different info relating to the bundle. That is along with the packages merchandise that makes use of the find_packages() operate imported from setuptools to seek out sub-packages.
Right here is the setup.py file of the pathology bundle:
from setuptools import setup, find_packages

setup(identify="pathology",
      model='0.1',
      url="https://github.com/the-gigi/pathology",
      license="MIT",
      creator="Gigi Sayfan",
      author_email="the.gigi@gmail.com",
      description='Add static script_dir() technique to Path',
      packages=find_packages(exclude=['tests']),
      long_description=open('README.md').learn(),
      zip_safe=False)
Supply Distribution Bundle
A supply distribution bundle refers to an archive file that accommodates python packages, modules in addition to different recordsdata which can be used for a bundle launch (for instance, model 1, 2, and so forth). As soon as the file has been distributed, finish customers can obtain and set up it on their working system.
To create a supply distribution bundle (sdist), you run: python setup.py sdist
Let’s construct a supply distribution:
$ python setup.py sdist
operating sdist
operating egg_info
creating pathology.egg-info
writing pathology.egg-info/PKG-INFO
writing dependency_links to pathology.egg-info/dependency_links.txt
writing top-level names to pathology.egg-info/top_level.txt
writing manifest file 'pathology.egg-info/SOURCES.txt'
studying manifest file 'pathology.egg-info/SOURCES.txt'
writing manifest file 'pathology.egg-info/SOURCES.txt'
warning: sdist: normal file not discovered: ought to have certainly one of README, README.rst, README.txt

operating test
creating pathology-0.1
creating pathology-0.1/pathology
creating pathology-0.1/pathology.egg-info
copying recordsdata to pathology-0.1...
copying setup.py -> pathology-0.1
copying pathology/__init__.py -> pathology-0.1/pathology
copying pathology/path.py -> pathology-0.1/pathology
copying pathology.egg-info/PKG-INFO -> pathology-0.1/pathology.egg-info
copying pathology.egg-info/SOURCES.txt -> pathology-0.1/pathology.egg-info
copying pathology.egg-info/dependency_links.txt -> pathology-0.1/pathology.egg-info
copying pathology.egg-info/not-zip-safe -> pathology-0.1/pathology.egg-info
copying pathology.egg-info/top_level.txt -> pathology-0.1/pathology.egg-info
Writing pathology-0.1/setup.cfg
creating dist
Creating tar archive
eradicating 'pathology-0.1' (and all the pieces underneath it)
The warning is as a result of I used a non-standard README.md file. It is secure to disregard. The command above will create an archive file with the default format for the present working system. For Unix programs, a gzipped tar file can be generated, underneath the dist listing:
$ ls -la dist
whole 8
drwxr-xr-x   3 gigi.sayfan  gigi.sayfan   102 Apr 18 21:20 .
drwxr-xr-x  12 gigi.sayfan  gigi.sayfan   408 Apr 18 21:20 ..
-rw-r--r--   1 gigi.sayfan  gigi.sayfan  1223 Apr 18 21:20 pathology-0.1.tar.gz
In case you are utilizing Home windows, a zipper file is generated.
It’s also possible to specify different further file codecs utilizing the format possibility as follows.
python setup.py sdist --formats=gztar,zip
For instance, the above command will generate a gzipped tarball and a zipper file.
The totally different codecs accessible are:
-
zip: .zip -
gztar: .tar.gz -
bztar: .tar.bz2 -
xztar: .tar.xz -
ztar: .tar.Z -
tar: .tar
Binary Distribution
To create a binary distribution, known as a wheel, you run: python setup.py bdist_wheel
And here’s a binary distribution:
$ python setup.py bdist_wheel
operating bdist_wheel
operating construct
operating build_py
creating construct
creating construct/lib
creating construct/lib/pathology
copying pathology/__init__.py -> construct/lib/pathology
copying pathology/path.py -> construct/lib/pathology
putting in to construct/bdist.macosx-10.7-x86_64/wheel
operating set up
operating install_lib
creating construct/bdist.macosx-10.7-x86_64
creating construct/bdist.macosx-10.7-x86_64/wheel
creating construct/bdist.macosx-10.7-x86_64/wheel/pathology
copying construct/lib/pathology/__init__.py -> construct/bdist.macosx-10.7-x86_64/wheel/pathology
copying construct/lib/pathology/path.py -> construct/bdist.macosx-10.7-x86_64/wheel/pathology
operating install_egg_info
operating egg_info
writing pathology.egg-info/PKG-INFO
writing dependency_links to pathology.egg-info/dependency_links.txt
writing top-level names to pathology.egg-info/top_level.txt
studying manifest file 'pathology.egg-info/SOURCES.txt'
writing manifest file 'pathology.egg-info/SOURCES.txt'
Copying pathology.egg-info to construct/bdist.macosx-10.7-x86_64/wheel/pathology-0.1-py3.6.egg-info
operating install_scripts
creating construct/bdist.macosx-10.7-x86_64/wheel/pathology-0.1.dist-info/WHEEL
The pathology bundle accommodates solely pure Python modules, so a common bundle will be constructed. In case your bundle consists of C extensions, you will must construct a separate wheel for every platform:
$ ls -la dist
whole 16
drwxr-xr-x   4 gigi.sayfan  gigi.sayfan   136 Apr 18 21:24 .
drwxr-xr-x  13 gigi.sayfan  gigi.sayfan   442 Apr 18 21:24 ..
-rw-r--r--   1 gigi.sayfan  gigi.sayfan  2695 Apr 18 21:24 pathology-0.1-py3-none-any.whl
-rw-r--r--   1 gigi.sayfan  gigi.sayfan  1223 Apr 18 21:20 pathology-0.1.tar.gz
For a deeper dive into the subject of packaging Python libraries, take a look at The way to Write Your Personal Python Packages.
The way to Distribute a Python Bundle
Python has a central bundle repository known as PyPI (Python Packages Index). PyPI makes it straightforward to handle totally different variations of packages. For instance, if a consumer wants to put in a particular bundle model, pip is aware of the place to search for it.
While you set up a Python bundle utilizing pip, it would obtain the bundle from PyPI (until you specify a unique repository). To distribute our pathology bundle, we have to add it to PyPI and supply some additional metadata PyPI requires. The steps are:
- Improve your pip vesrion.
- Create an account on PyPI (simply as soon as).
- Register your bundle.
- Add your bundle.
Improve Your pip Model
Guarantee you’ve the most recent model of pip put in in your working system. To improve pip, situation the next command
python3 -m pip set up --upgrade pip
Create an Account
You may create an account on the PyPI web site. Then create a .pypirc file in your house listing:
[distutils]
index-servers=pypi

[pypi]
repository = https://pypi.python.org/pypi
username = the_gigi
For testing functions, you possibly can add a pypitest index server to your .pypirc file:
[distutils]
index-servers=
    pypi
    pypitest

[pypitest]
repository = https://testpypi.python.org/pypi
username = the_gigi

[pypi]
repository = https://pypi.python.org/pypi
username = the_gigi
Register Your Bundle
If that is the primary launch of your bundle, you must register it with PyPI. Use the register command of setup.py. It can ask you on your password. Be aware that I level it to the take a look at repository right here:
$ python setup.py register -r pypitest
operating register
operating egg_info
writing pathology.egg-info/PKG-INFO
writing dependency_links to pathology.egg-info/dependency_links.txt
writing top-level names to pathology.egg-info/top_level.txt
studying manifest file 'pathology.egg-info/SOURCES.txt'
writing manifest file 'pathology.egg-info/SOURCES.txt'
operating test
Password:
Registering pathology to https://testpypi.python.org/pypi
Server response (200): OK
Add Your Bundle
Now that the bundle is registered, we will add it. I like to recommend utilizing twine, which is safer. Set up it as common utilizing pip set up twine. Then add your bundle utilizing twine and supply your password (redacted beneath):
$ twine add -r pypitest -p <redacted> dist/*
Importing distributions to https://testpypi.python.org/pypi
Importing pathology-0.1-py3-none-any.whl
[================================] 5679/5679 - 00:00:02
Importing pathology-0.1.tar.gz
[================================] 4185/4185 - 00:00:01
The bundle is now accessible on the Pypi official website as proven beneath.
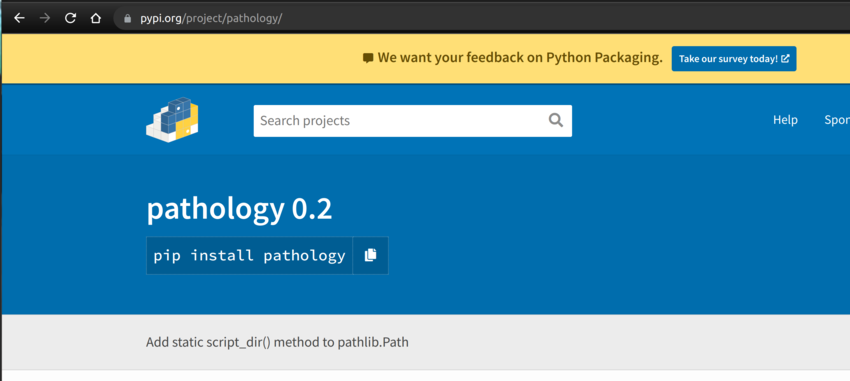


To put in it with pip, merely situation the next command:
pip set up pathology
For a deeper dive into the subject of distributing your packages, take a look at The way to Share Your Python Packages.
Conclusion
On this tutorial, we went by the absolutely fledged strategy of writing a Python library, packaging it, and distributing it by PyPI. At this level, it is best to have all of the instruments to write down and share your libraries with the world.
This submit has been up to date with contributions from Esther Vaati. Esther is a software program developer and author for Envato Tuts+.