


Hello pretty individuals! 👋 Within the final two posts, we discovered how you can use the temperature, mild depth, and soil moisture sensors. To this point we’ve got coated all the sensors my greenhouse goes to have within the alpha model. I do know I’m lacking out on the integral humidity sensor however I didn’t have that one mendacity round 😅. Properly, 3 sensors are greater than sufficient for our studying functions.
Within the final posts, we had been solely sending values to the laptop computer over a serial port. On this put up, I’ll educate you how you can join an LCD with Arduino in order that we are able to get the readings on a reasonably show.
Step 1: Wiring up the Circuit
We might be utilizing the next gadgets:
I’m not gonna lie, the wiring is a bit tedious. Nonetheless, should you comply with it step-by-step it received’t take you lengthy to wire every thing up. It will be wired like this image:
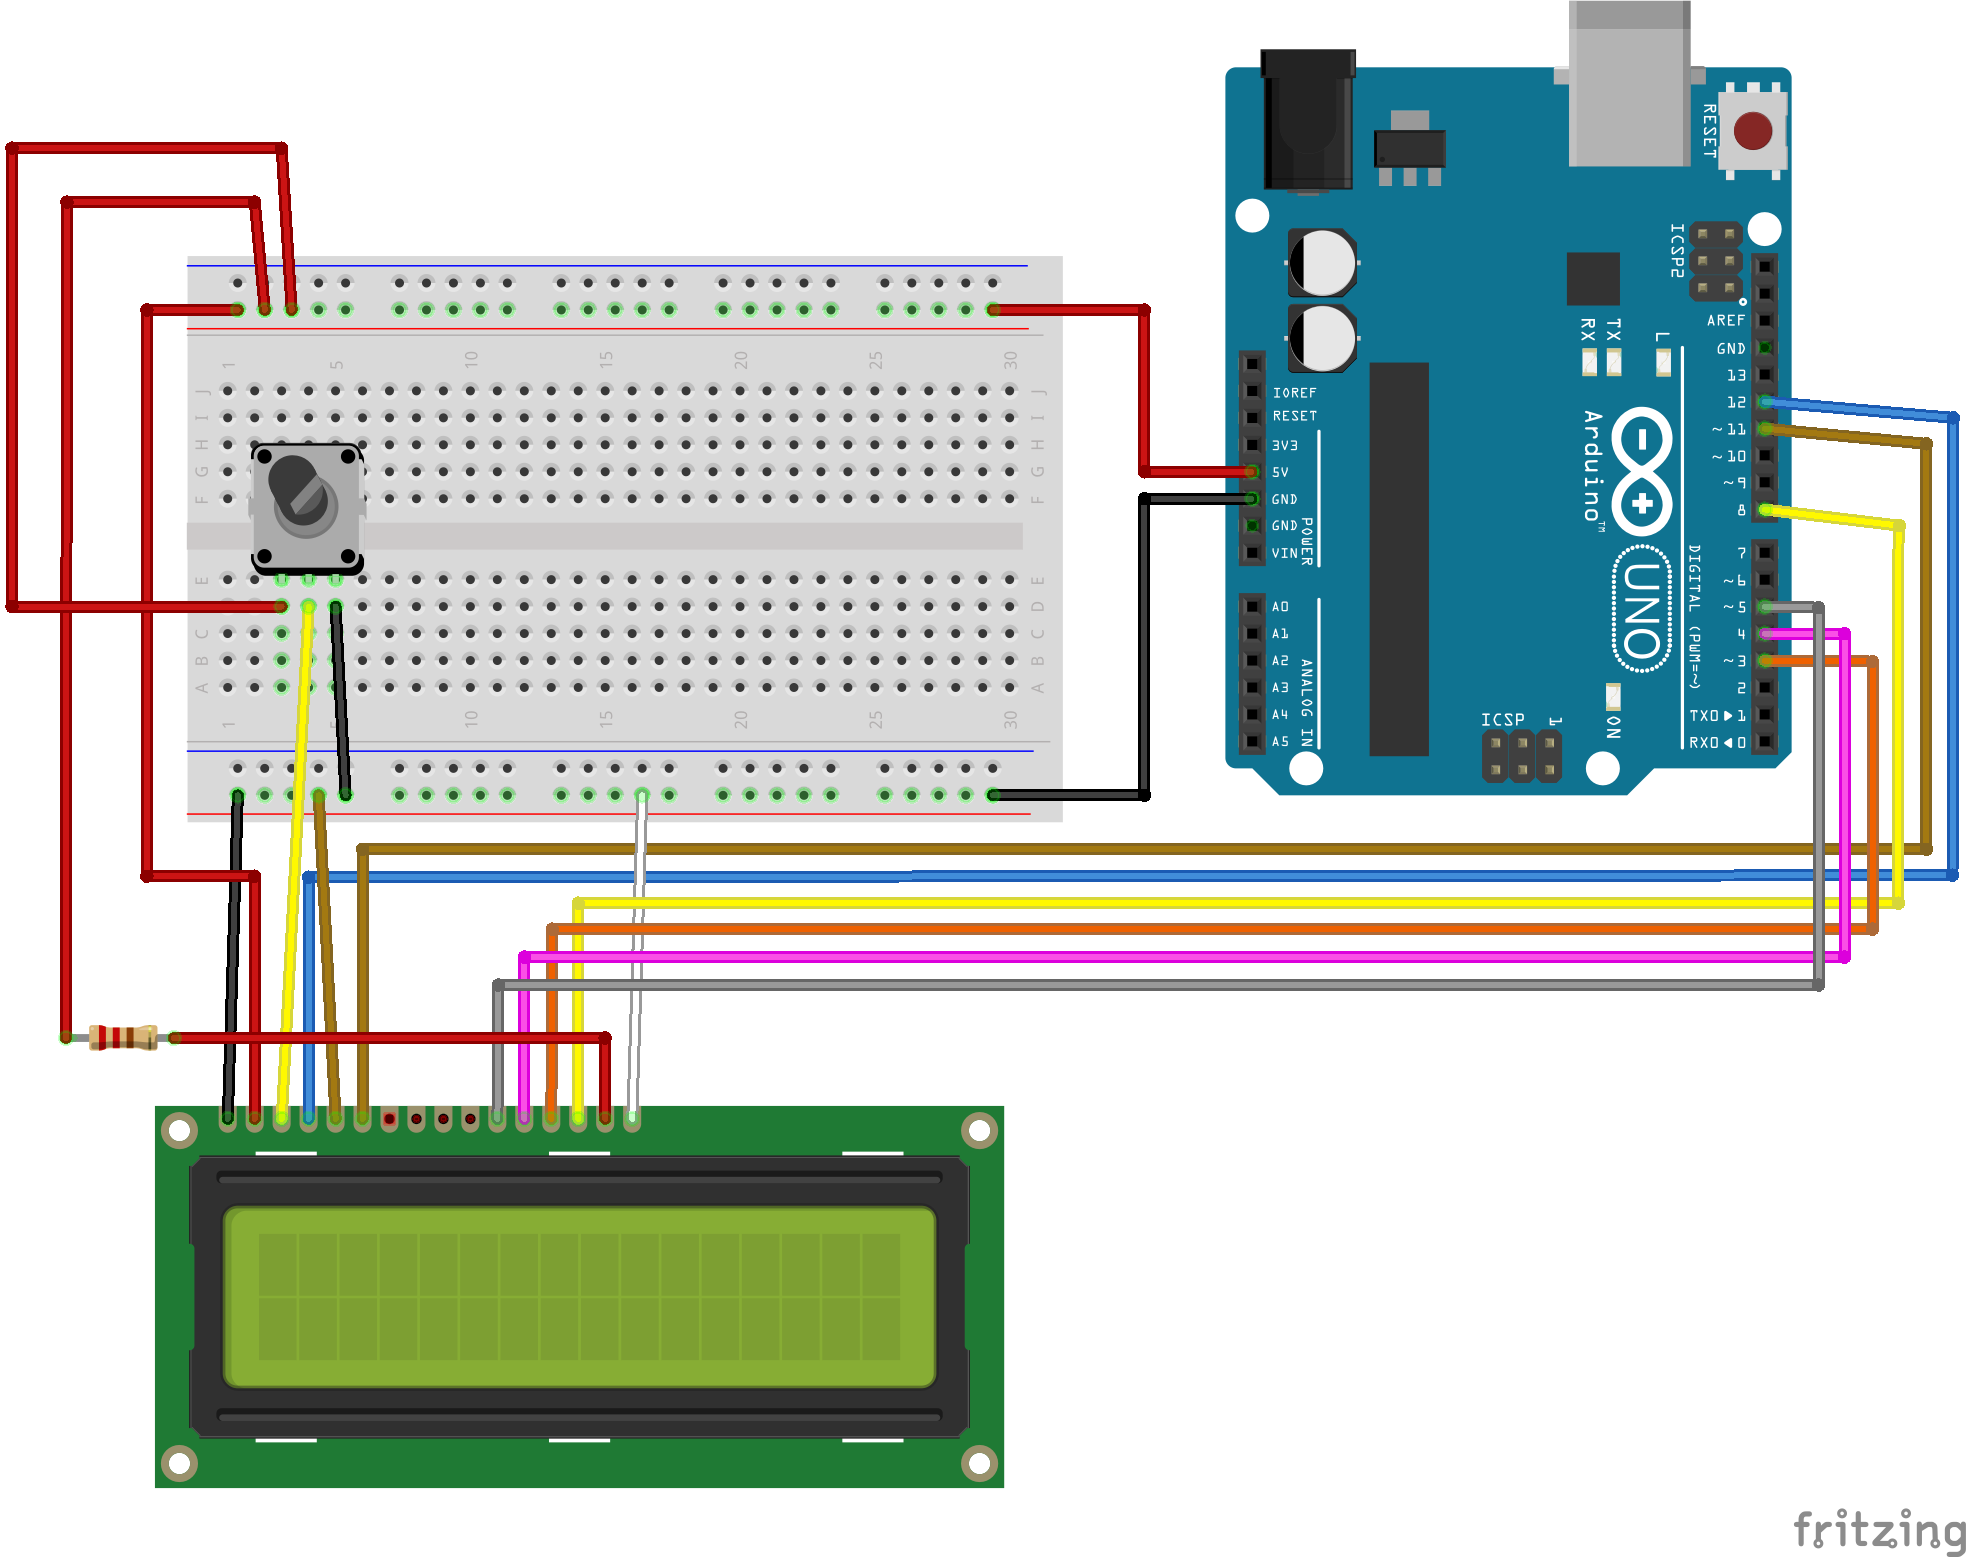
The connections are:
pin1  -> floor
pin2  -> constructive
pin3  -> center pin of 10kΩ potentiometer
pin4  -> 12
pin5  -> gnd
pin6  -> 11
pin11 -> 5
pin12 -> 4
pin13 -> 3
pin14 -> 8
pin15 -> 220Ω -> constructive
pin16 -> floor
Step 2: Coding the Arduino
We might be utilizing the LiquidCrystal library to interface with the LCD display screen. It makes every thing tremendous straightforward. Right here is a few pattern code:
#embody <LiquidCrystal.h>

LiquidCrystal liquid crystal display(12, 11, 5, 4, 3, 8);

void setup(){
    liquid crystal display.start(16, 2);
    liquid crystal display.print('Whats up World!');
}

void loop(){
}
This code will arrange the LCD. On line 3 the numbers have to be actual. They correspond to the bodily wire connections we’ve got made on the Arduino. In the event you change any connection ensure that to replace this line as nicely.
There are a few enjoyable issues you need to know which you are able to do with an LCD. You possibly can create customized characters to show on the display screen. Let’s say we wish to show a thermometer. We will use this web site to get the binary code for a thermometer and use it like this:
#embody <LiquidCrystal.h>

LiquidCrystal liquid crystal display(12, 11, 5, 4, 3, 8);

byte thermometer[8] = //icon for thermometer
{
    B00100,
    B01010,
    B01010,
    B01110,
    B01110,
    B11111,
    B11111,
    B01110
};

void setup(){
    // Set cursor to character 0 line 0
    liquid crystal display.start(16, 2);
    liquid crystal display.setCursor(0,0) ;
    liquid crystal display.createChar(1,thermometer);
    liquid crystal display.write(1);
}

void loop(){
}
Now add the code to the Arduino and try it out! The LCD ought to mild up. You need to use the Potentiometer to regulate the distinction of the show.
I hope you guys loved this fast tutorial on how you can arrange an LCD with Arduino. Within the subsequent article we are going to merge the three sensors we’ve got discovered to make use of, and the show, in a single ultimate challenge. This ultimate challenge might be our greenhouse monitoring system and can give us real-time updates in regards to the scenario of our greenhouse
See you within the subsequent put up! ❤️