


Hello pretty folks! 👋 Within the final article we talked in regards to the soil moisture sensor. On this article, we’ll check out the way to measure temperature utilizing DS18b20 and measure mild depth utilizing a photocell.
Step 1: Wiring up the Circuit
We can be utilizing:
- Arduino UNO
- Breadboard
- DS18B20 Temperature Sensor
- Photocell (any typical one)
- 4.7KΩ resistor
- 10KΩ resistor
- Jumper Wires
Wire up the circuit like this:
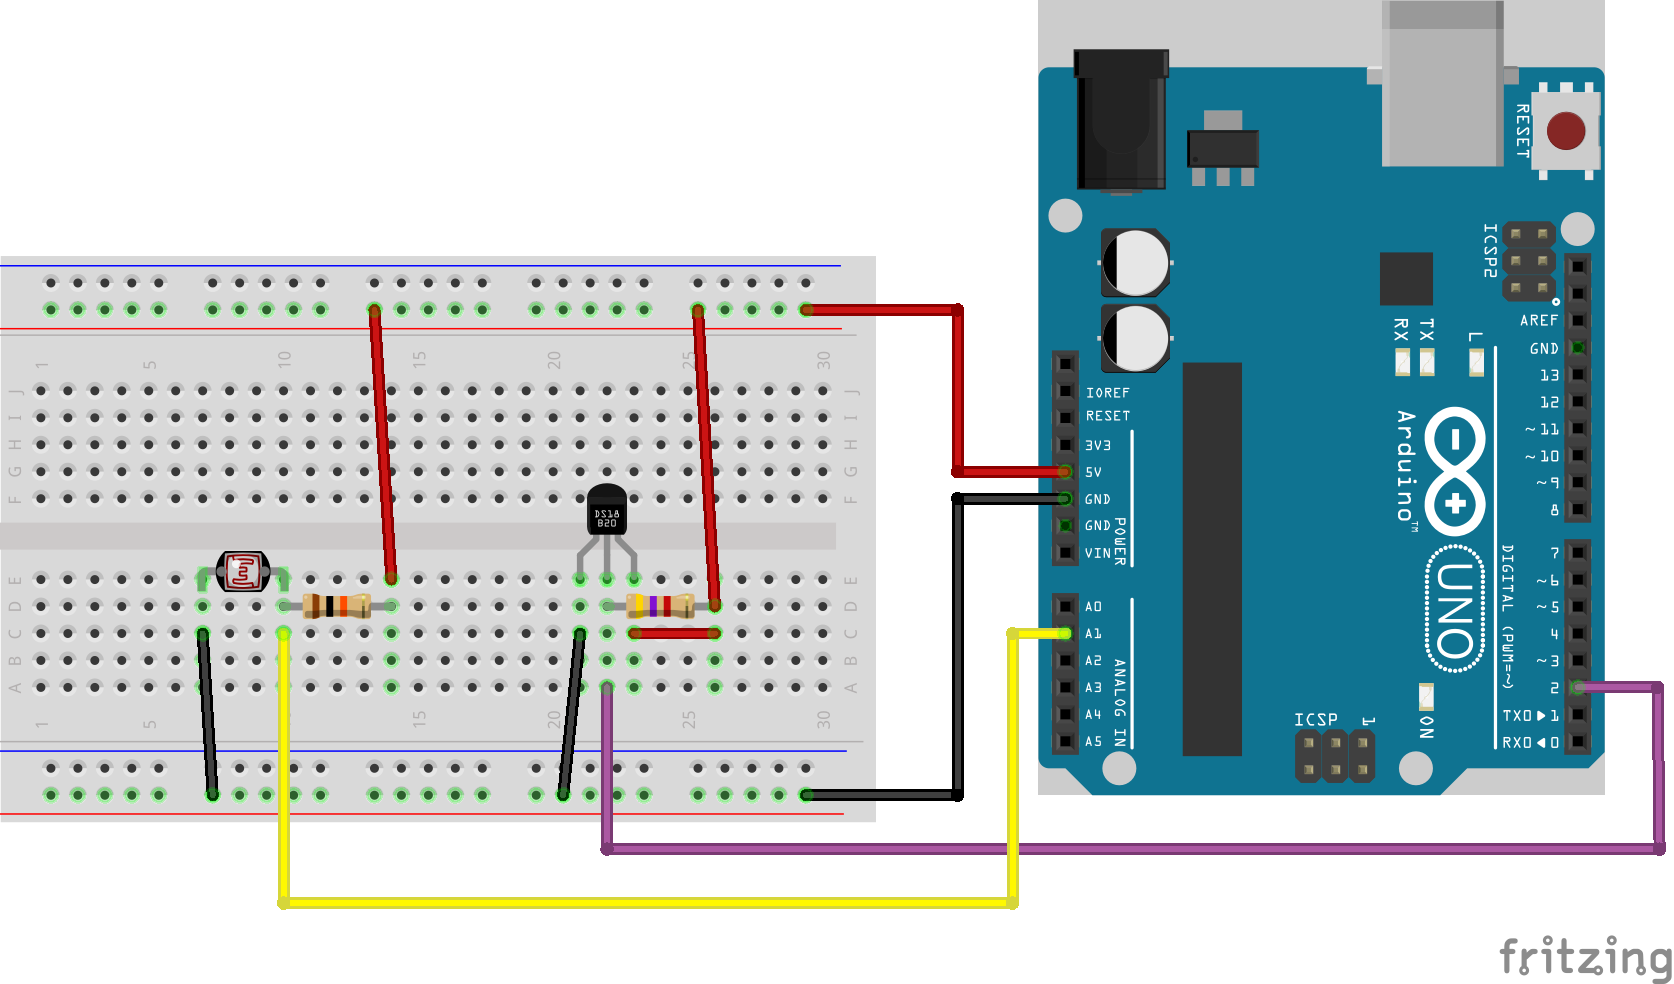
Notice: Click on on the picture to view a bigger model
I’ve wired up the 4.7KΩ resistor in parallel with the constructive terminal and the digital enter wire popping out of DS18B20. The 10KΩ resistor is related between the photocell and the 5V enter.
The studying of the photocell will increase with a lower in brightness and reduces with a rise in brightness. It ranges from 0 to 1023.
The DS18B20 temp sensor provides readings in diploma Celsius by default. You’ll be able to convert it into Fahrenheit if you would like although.
Step 2: Coding the Arduino
It’s essential set up the Dallas Temperature library and the One Wire library for this code to work. You’ll be able to obtain them utilizing the library supervisor within the Arduino IDE.
// Embody the libraries
#embody <DallasTemperature.h>
#embody <OneWire.h>

// That is the place the temp sensor is plugged in.
// Change this to the analog enter the place your temp
// sensor is plugged in (if completely different)
#outline ONE_WIRE_BUS 2
OneWire oneWire(ONE_WIRE_BUS);

int photoPin = A1;

// Move the oneWire ref to Dallas Temperature Sensor
DallasTemperature sensors(&oneWire);

void setup(){
    // Set the photocell sensor pin to INPUT mode
    pinMode(photoPin, INPUT);

    // Setup the temp sensor and serial comm
    sensors.start();
    Serial.start(9600);
}

void loop() {
    // Get photocell studying
    int photoValue = analogRead(photoPin);
    Serial.print("Photocell studying: ");
    Serial.print(photoValue);

    // Get temperature studying
    sensors.requestTemperatures();
    Serial.print(" - Temperature: ");

    // We enter 0 as index as a result of we are able to have greater than
    // 1 IC hooked up to the identical bus
    int tempVal = sensors.getTempCByIndex(0);
    Serial.println(tempVal);

    delay(1000);
}
The code is easy. We embody the libraries we can be utilizing. We outline analog enter 2 as ONE_WIRE_BUS and inform DallasTemperature that the sensor is hooked up on enter 2.
In setup we merely set pin modes and setup temperature sensor and serial communication.
In loop, we take readings from photocell and DS18B20 and ship them over serial to the laptop computer.
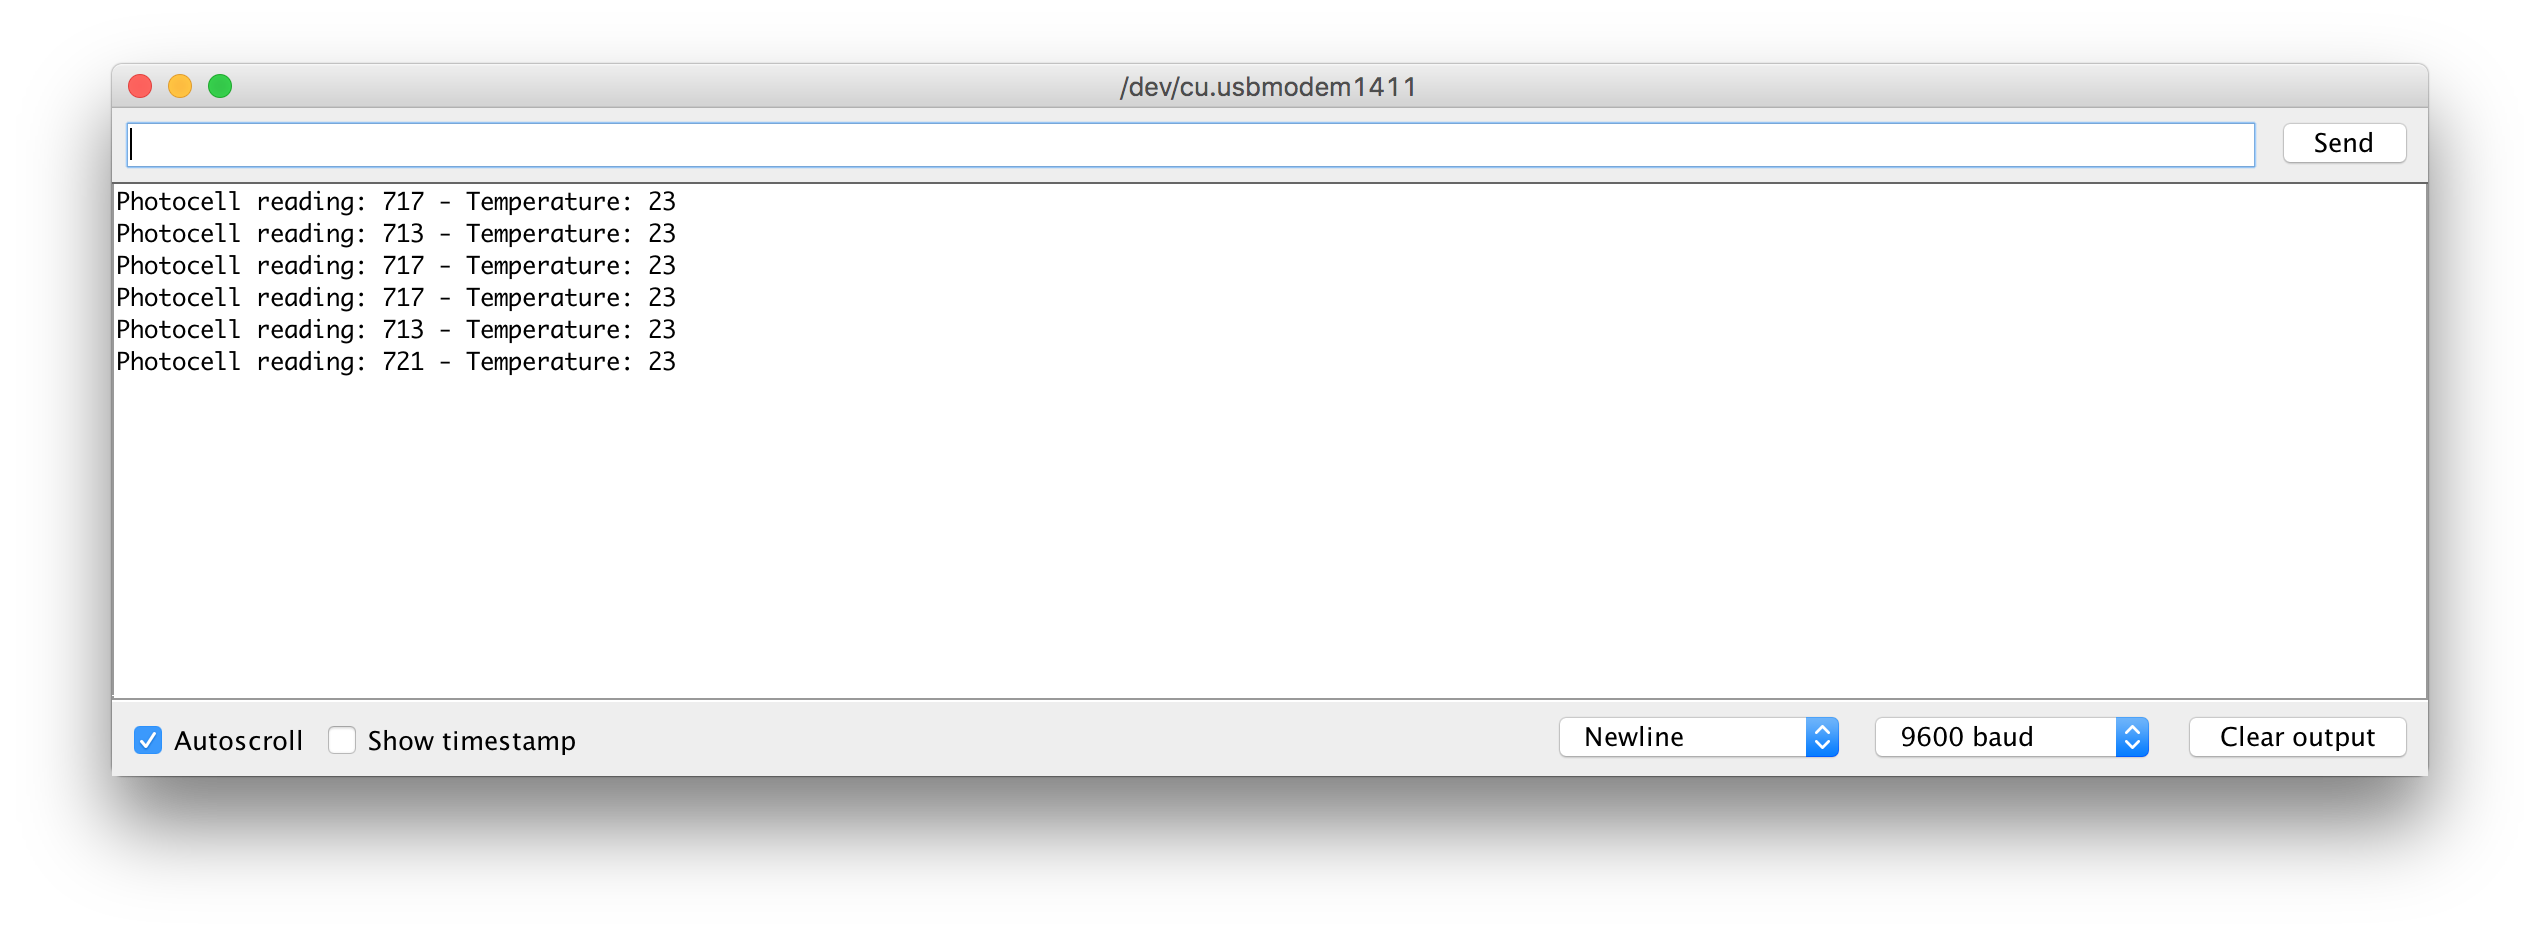
Now save the code and add it to Arduino. Open the serial monitor and you must begin seeing readings like this:
If every little thing is working then good! If not, undergo the wiring steps once more. If it nonetheless doesn’t make any sense undergo the references I’ve linked beneath.
I’ll see you within the subsequent article the place we wire up an LCD with all of this! ❤️