


Hello beautiful folks! 👋 You probably have learn any of my different articles you could be conscious that I’m working with electronics proper now. After studying the fundamentals of Arduino, I made a decision to work on a comparatively formidable challenge. I made a decision to make a greenhouse monitoring system. I’m going to put in writing a collection of posts introducing you to all the sensors one after the other and by the top of this collection, we could have a totally practical, tremendous primary, greenhouse monitoring system.
On this publish, I’ll introduce you to the YL-69 Soil Moisture Sensor. This can be a very primary and low cost soil moisture sensor and will be purchased from oddwires.
Step 1: Wiring up the circuit
Let’s begin off by organising the circuit. I’m utilizing:
- Arduino UNO
- Breadboard
- YL-69 Soil Moisture Sensor
- Jumper Wires
Wire up the circuit like this:
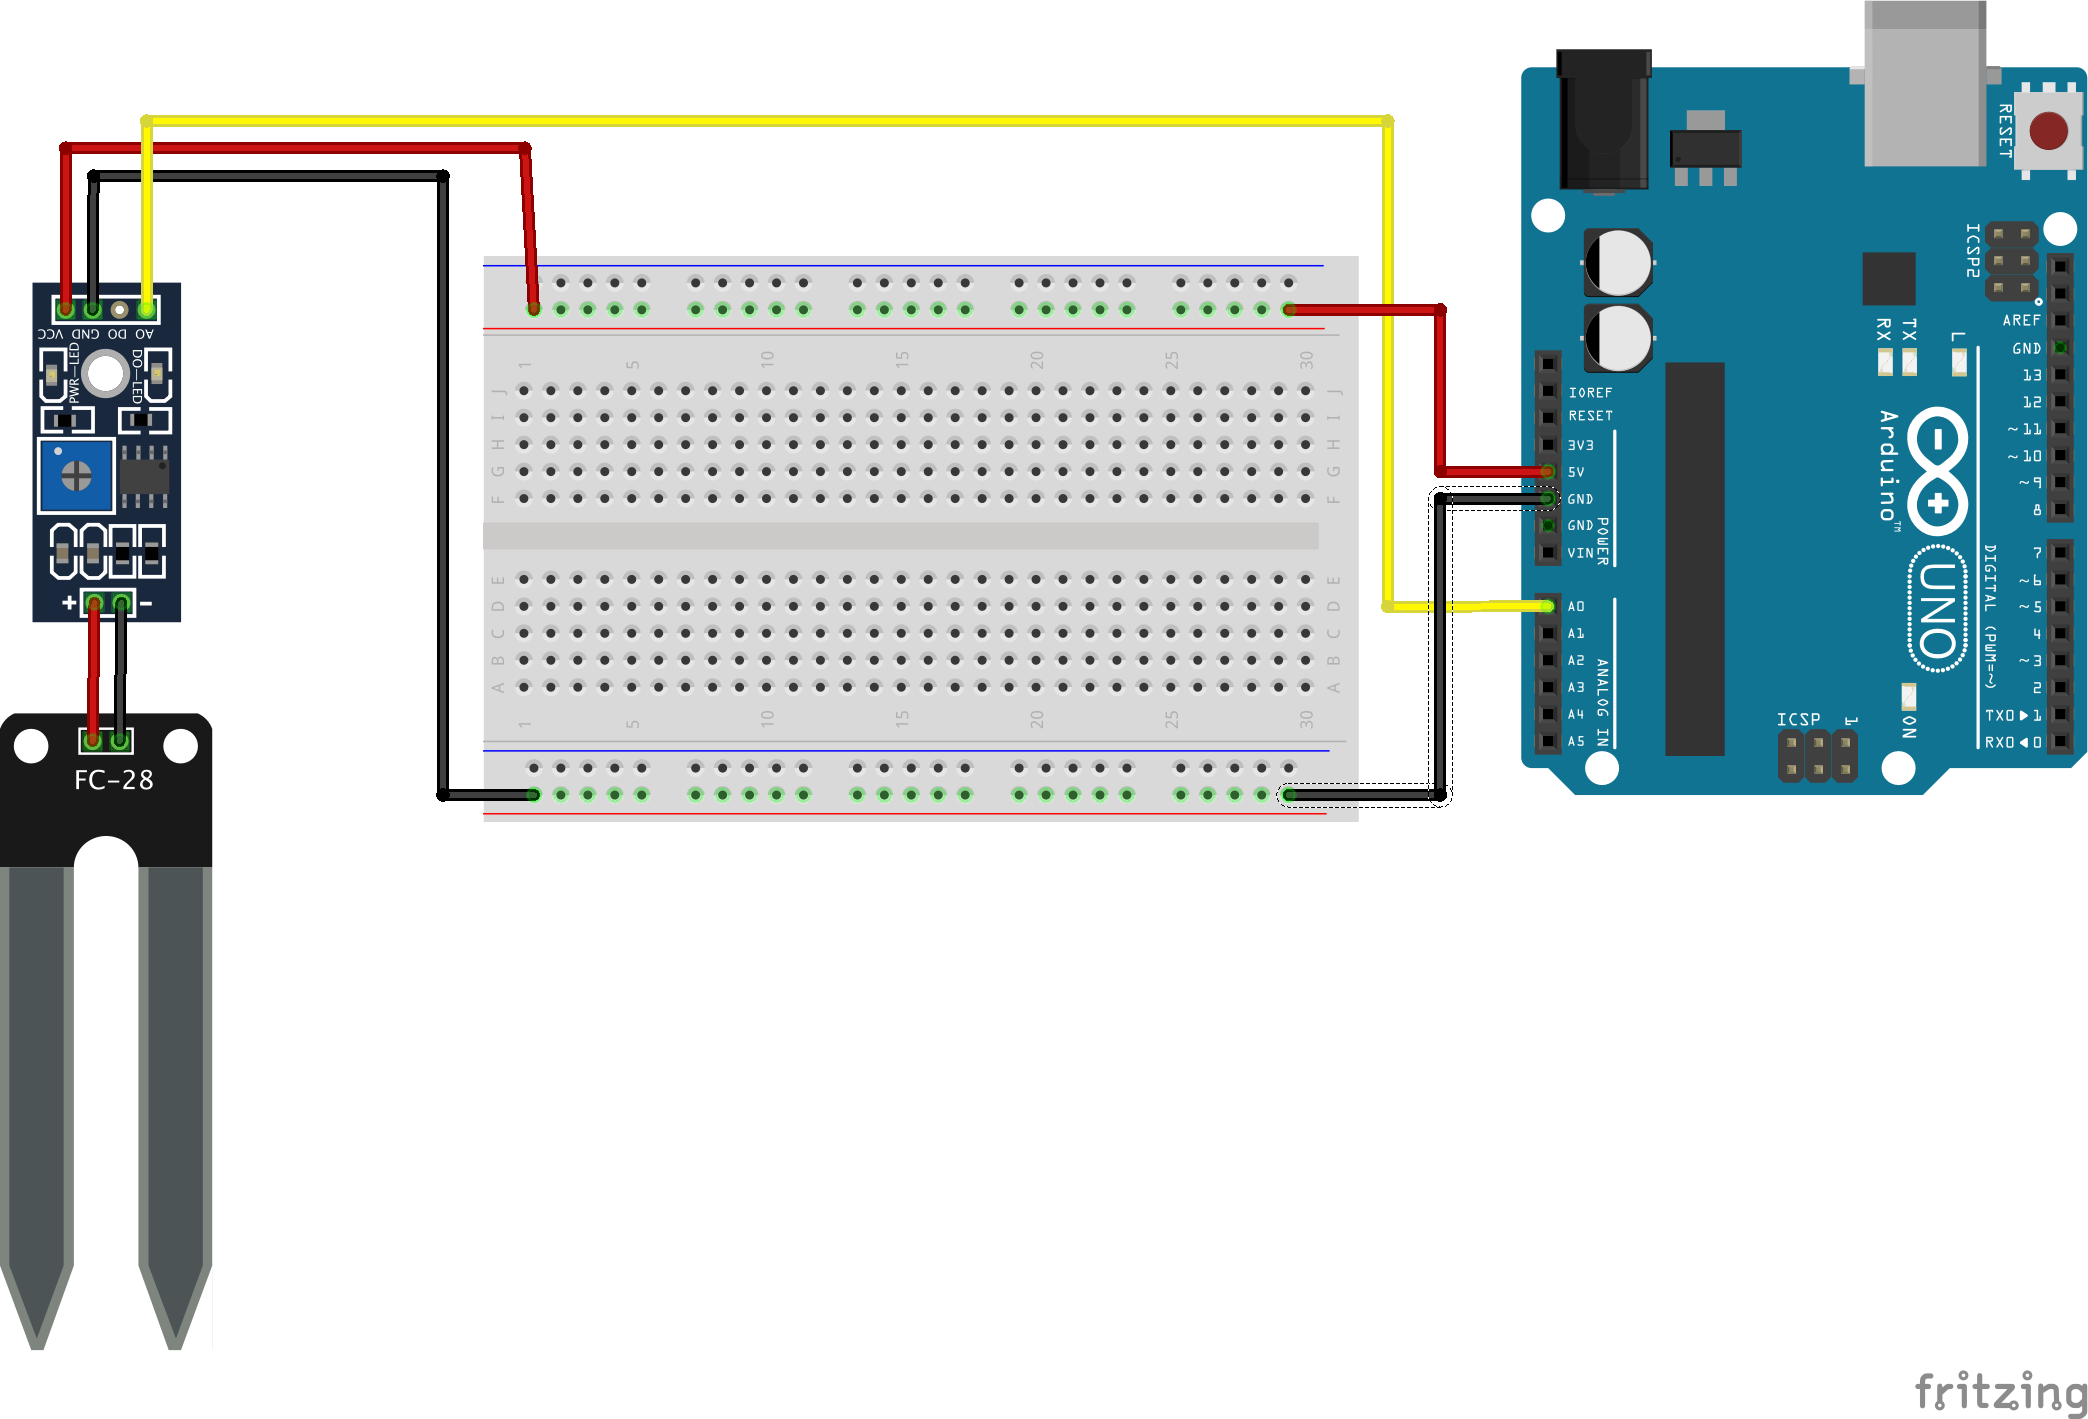
Observe: Click on on the picture to view a bigger model
The output from the moisture sensor modifications based mostly on how a lot water is within the soil. It ranges from 0 to 1023. 1023 signifies that there isn’t a water and 0 means there may be good conductivity and therefore loads of water.
Step 2: Coding the Arduino
int moisturePin = A0;
int threshold = 750;

void setup(){
    pinMode(moisturePin, INPUT);
    Serial.start(9600);
}

void loop(){
    int sensorValue = analogRead(moisturePin);
    Serial.print(sensorValue);
    if (sensorValue < threshold){
        Serial.println(" - Plant does not want water");
    } else {
        Serial.println(" - Plant wants water!");
    }
    delay(1000);
}
The code is easy. We first outline the moisturePin as A0. That is the place the enter from our moisture sensor is coming in. Then we set the brink worth to 750. This worth dictates what we assume to be one of the best soil moisture degree. You would possibly wish to change it to one thing else based mostly on private testing. After that, we use the analogRead perform to learn the worth from pin A0 and based mostly on the studying we ship some data to the serial monitor.
Lastly, we add a delay for one second in order that we will get dependable and paced readings. There is no such thing as a use in taking a studying each millisecond.
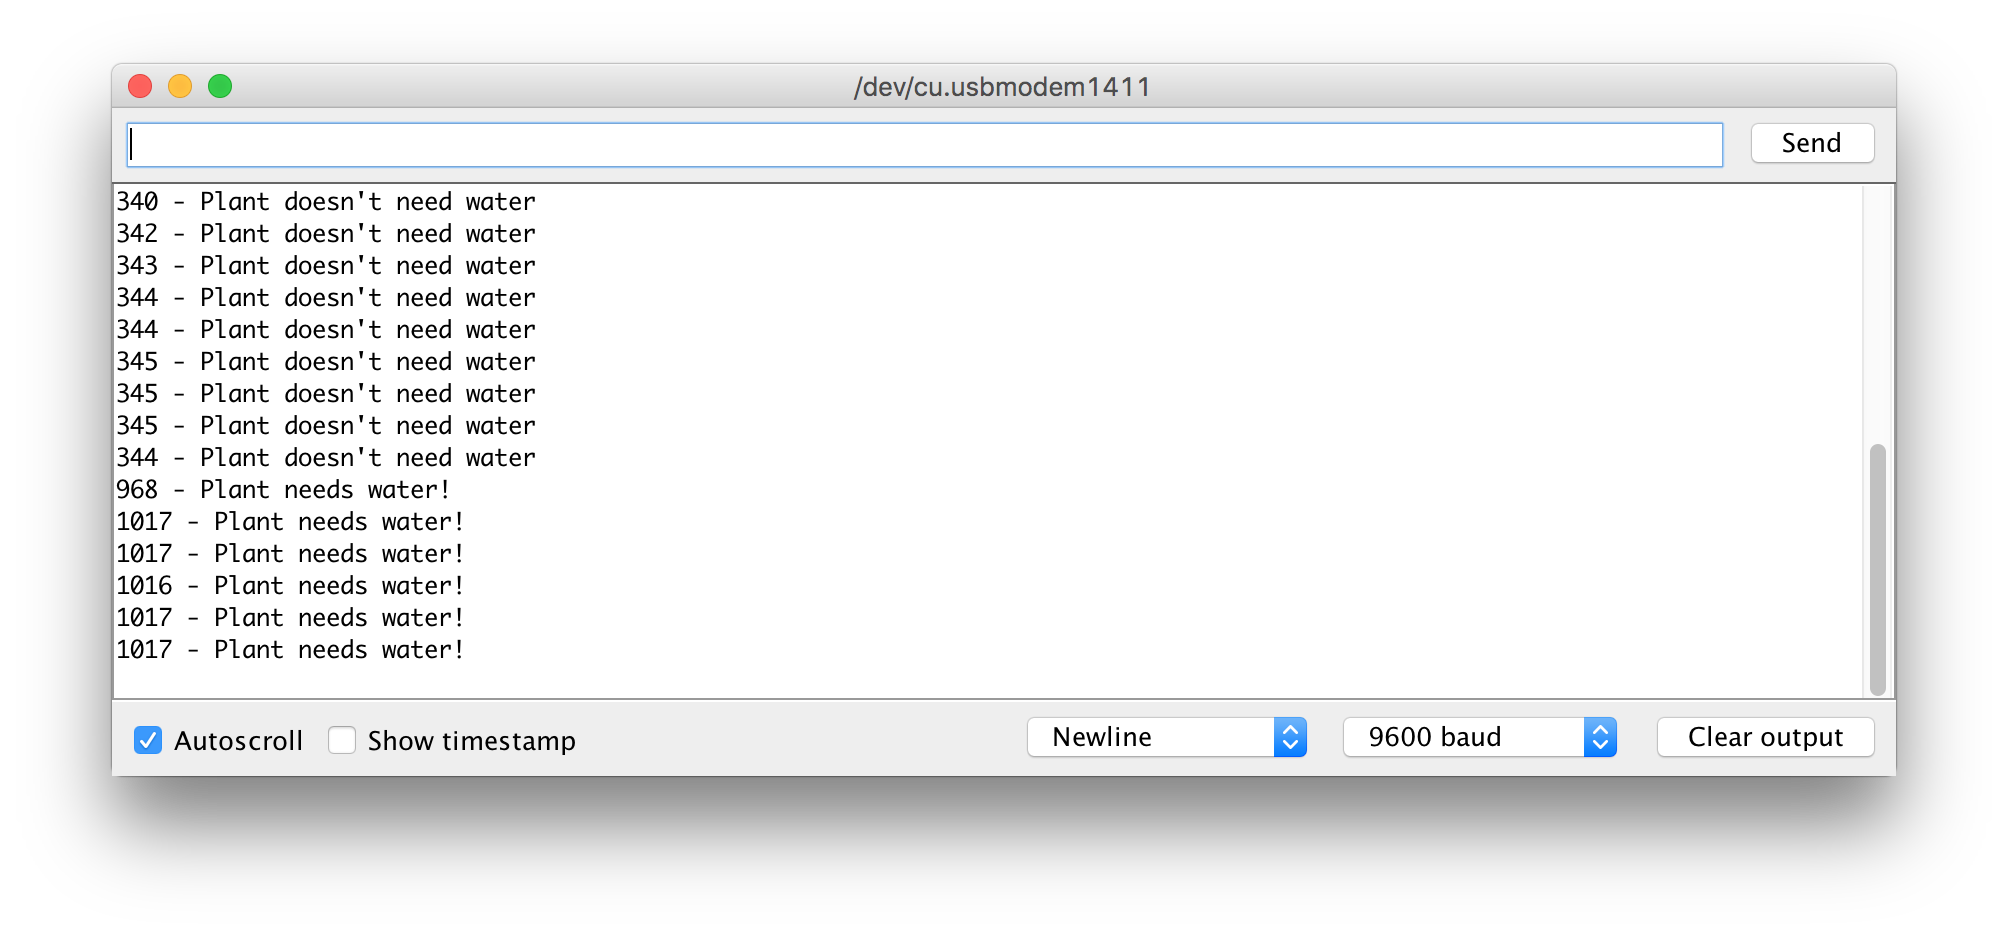
And that’s it! Join the Arduino to your laptop computer, add the code and take a look at placing the sensor in soil! It ought to offer you an output like this within the serial monitor:
Within the subsequent article, we are going to discover ways to measure temperature and lightweight depth utilizing the Arduino. See you then! ❤️